- Home
- Walkthrough
1. New York 3. Return to New York Liberty Island Return to Hell's Kitchen The Warehouse Assignment The Wall Cloud, The Graveyard Ambrosia, Airfields, and Apostasy 4. Paris The Insurrection Finding Nicolette The Great Escape Finding Morgan Everett 2. Hong Kong 5. Southern California The Helibase Vandenberg Deactivating the Kill Switch The Gas Station Versalife The Submarine Base The Missile Silo Area 51 - Strategies
- Extras
Paris, Part II
Introduction
This second half of the Paris walkthroughs gets you through the DuClare chateau all the way to the end of our business in Paris. Again, there anything that's particularly difficult here. As for invincible AIs, we have Nicolette DuClare, Alex Jacobson, and Morgan Everett.
Chateau DuClare
This place is completely devoid of enemies, so I will be brief describing what to do here. Enter through the boarded-up door at the back. If you want to listen to Nicolette's comments on various rooms (including a login to the ground-floor computer which contains some background reading) let her keep up, but it's not necessary - she will find her way anyway. Here and there you will also receive messages from Icarus, but by this time you will have probably learned to ignore him. Head upstairs, go past two doors until you've reached the balcony with a small table and take Beth's key from behind the vase there. Use the key on the next door, move the painting above Beth's desk and collect what you came here for: another computer login, 100 credits and a key to the wine cellar.
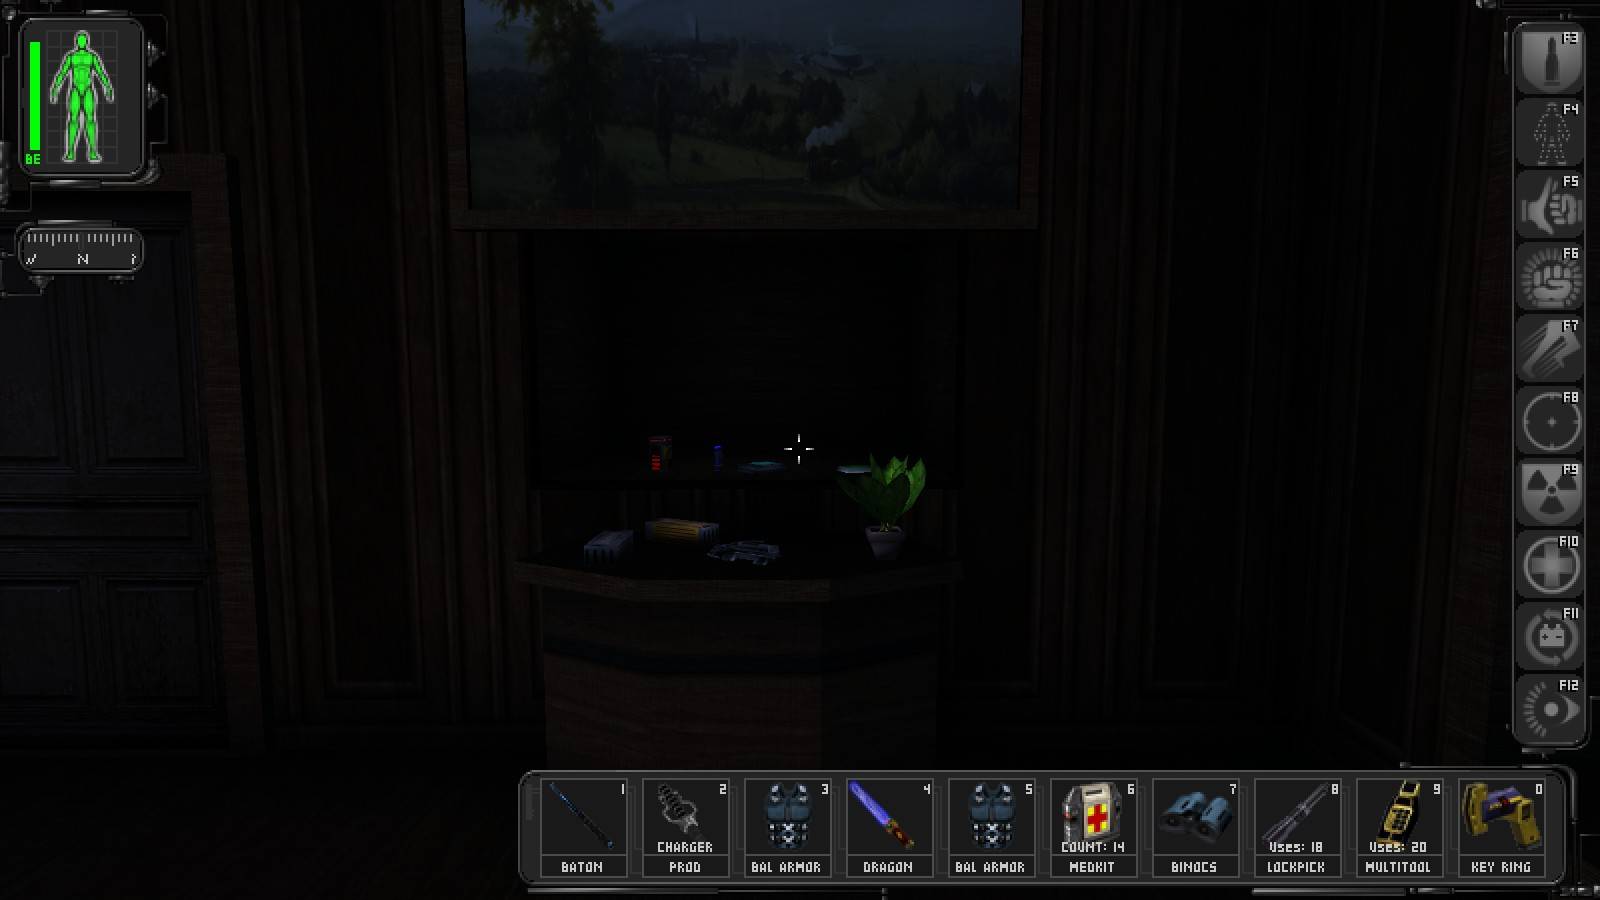
There is also a key to Nicolette's bedroom on one of the shelves, so instead of getting a ride on the dumbwaiter retrace your steps to the first door on this floor (you can stop by the bathroom on your way for another identical key and a medkit). Inside you will find a soda, a candy bar and a lockpick, along with another lockpick and thermoptic camo in the secret stash accessible by pushing the skull on the mantelpiece. Head back to the ground floor and to the kitchen on the far end of the house, possibly stopping by the room with a big fireplace for a multitool and the second key to Beth's bedroom. The kitchen itself contains three bags of soy food, two sodas, another multitool and the door to the cellar, which we can now open.
Head north for a lockpick, then walk over to the southern part of the cellar, where pulling the suspiciously out-of-place-looking candelabra will open a secret door. A bit beyond this door you will find stairs blocked with fallen beams. Despite their formidable appearance, they are no match our high-level combat skills. Alternatively you can get up one of the other fallen beams, into the vents, up to the narrow ledge along the walls of the chamber and via the window there (there are also two lockpicks on that ledge, but they can be picked up even if you go the opposite direction) to bypass the stairs and see Nicolette turn into a small bulldozer. Either way, there is a small, dark room off the landing on those stairs which contains a yet another lockpick and more - a terminal we can use to open the augmentation container ahead. You probably don't need another Aggressive Defence aug, but the upgrade canister will definitely prove useful.
If only we could do the same kind of damage by running around!
We've found what we were looking for, so use the computer to send a message to Morgan Everett and have him contact you back shortly thereafter. You will probably want to use the repair bot that is also in the room, possibly take the two flares, two biocells and the multitool too, then locate Nicolette and talk to her to get a key to the crypt at the local cemetery. Leave the chateau and enter the maze to finally stop being followed, after one final piece of trivia from Nicolette...
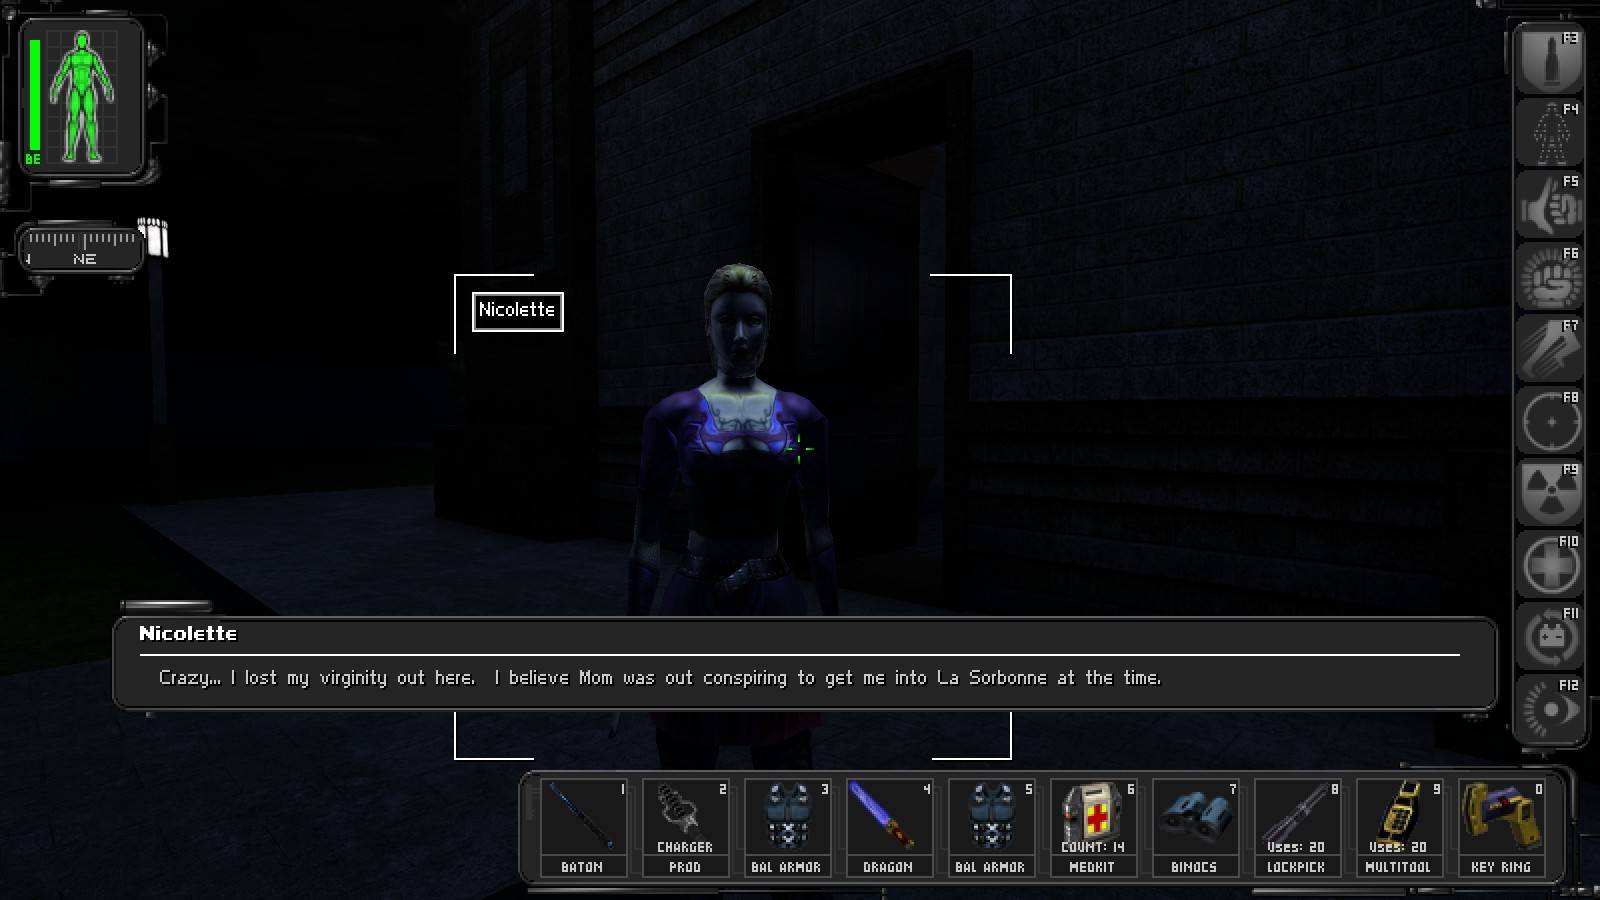
Sweet Jesus Nicolette . . .
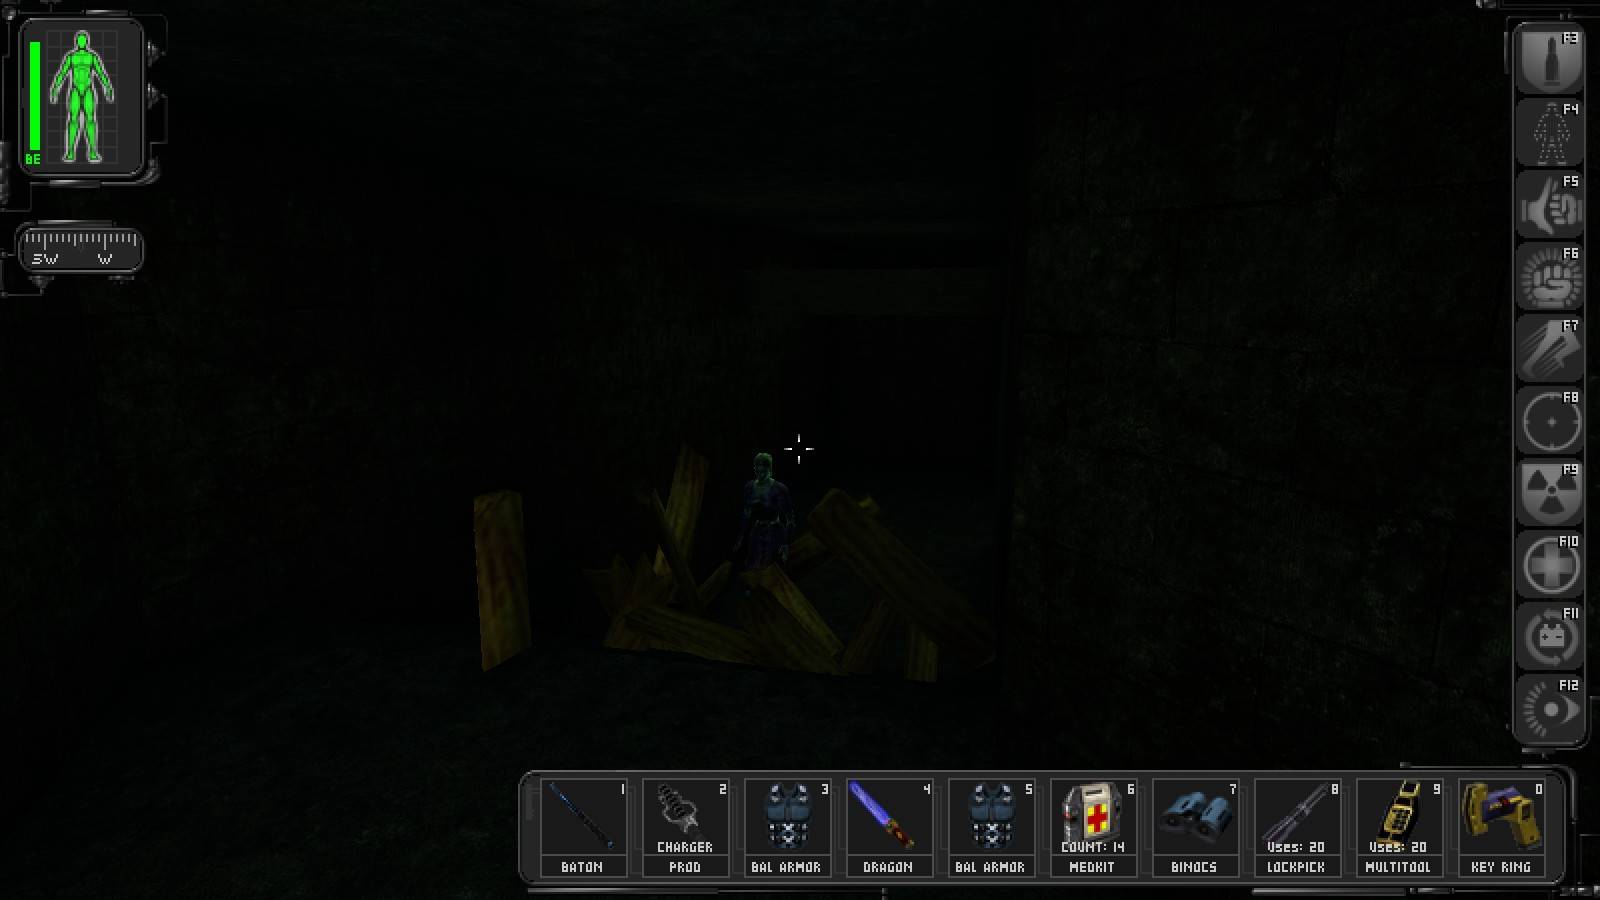
As it turns out we're not alone here now: the crypt is open and there are two MJ12 commandos guarding the cemetery and the nearby part of the maze. Okay, so I lied about there being no enemies here - but at least you can get another biocell of one of them and a medkit from the other. Once done, enter the smelly tunnels... once again.
The Cathedral, or the Illuminati Entry Fee
Once out of the sewers you will find yourself in a dead-end alley relatively close to the Templar Cathedral. A very dead-end alley, as it turns out - our progress is soon halted by a locked gate. On the other hand, don't the windows above the manhole we emerged from look as if there were something behind them? Some box stacking and one episode of vandalism later you will find that there indeed is - in addition to 100 credits, a candy bar and soy food on the dead girl there are also 150 more credits in the southwestern corner of the room and a fallen beam conveniently leading to the next floor, with a lockpick, two flares and the very key we need. You can either either use it or walk along the ledge accessible from where you are now and jump down past the gate, but either way the way is open once again.
Now there's a face you don't want to see in a dark alley. Or in broad daylight. Or anywhere.
Once again JC is greeted by the now all too familiar sight of a MJ12 commando - who however is not what one should worry about at this point. See the bridge-like structure up ahead? See the snipers patrolling it, with a good view of the area the commando patrols? And can you feel the ground shaking? Right. The commando patrols the area clockwise and for some reason whenever he stops in the niche to the right he stares at the wall for a while, so no real problems here, but don't let the snipers spot you or you won't even have time to be sorry. Use the short pillar-like objects to your advantage, they are tall enough to hide behind. Wait for the military bot to start heading away, then quickly make your way to the bridge and out of the snipers' field of view.
Unfortunately the door leading up to the bridge cannot be smashed open, so you'll probably have to pick the lock. Then again, there is one more thing one can try before that: break the sports shop display window to trigger the alarm, smash the turret, and hide nearby. With luck one of the snipers will open the door for you on his way to investigate the commotion. Either way, head upstairs.
There are three soldiers here, two patrolling the edges of the bridge and one watching over them while walking in the middle. Start with the latter, then take care of the other two as you see fit; the guys don't walk exactly in sync and the side ones watch the street once in a while, so even when there is still three of them there are times when nobody watches the end you are on. Just make sure you hide the bodies quickly. Also, the bot may see you if you tarry so don't give him that chance - get this right and soon you'll be able to repay it for this nuisance by shutting it down, using the terminal on the far side of the bridge. Collect whatever you need from the other stuff (100 credits, a multitool, 2 lockpicks and 3 flares).
Get down to the street and proceed ahead. The square with the entrance to the metro is guarded by another commando and an assault shotgun-toting trooper, following an U-shaped route along the edges of the square. The critical point here is the moment you enter the area: there is so much light here that you may be seen by the opposition even if they are on the far side of the square, both of them at the same time if you aren't lucky. On the other hand, once you have crouched by the low wall around the metro entrance and moved back into darkness you should have no problem taking them out.
Nick the armour from the nearby crate and head down to the station. Everyone and their grandmas will tell you not to go there, but screw them! Once down, start with the rooms to the east. The mechanic hanging out there has thermoptic camo for sale (and a multitool for taking off his unconscious body), there is also a bag of soy food, but the most interesting stuff here is at the far end of the room, in the upper-level storage area. If you get up there, either by power-jumping or by stacking boxes on the couch (there are some in the dark spot opposite the entrance).
For reference, a single box placed on the couch will do if you have level-2 speed aug; do the math yourself for other combinations - you will find a multitool and a book with details of a loaded account, with one digit missing. You can get the money from an ATM to the north from the main concourse, you'll have to smash the glass door but both cops and bots will ignore you. Also in the same room is the main reason why we headed down here now, a repair bot; it's definitely best to enter the cathedral complex fully charged. That's all down here for now, so return topside and get back on your merry way.
The next part of our approach takes JC over a walkway over a pool of water, right outside the cathedral compound. Since the area is patrolled by a commando and the walkway doesn't offer any hiding spots, be careful; luckily the grunt's patrol route includes a fair bit on the compound side, in case you really don't feel like waiting for him on the opposite end. By the way, although it is in fact possible to jump into the water and swim to the well in the middle of the compound, I wouldn't bother if I were you. The diving stretch is so long that JC will certainly take damage unless equipped with a rebreather or the swimming aug (at high upgrade level), the well area is pretty crowded and the only reward for taking this route is a measly lockpick (no skill points!). Instead, simply go ahead and hide behind plants right from the entrance to the courtyard; if you stay out of sight of security robots you will have no problems whatsoever.
There is one trooper straight ahead, but with all the robots in the area he is somewhat difficult to reach, at least from our present location. On the other hand, the one to the right is pretty easy to take out. Do that, then follow the robot to the support struts of the tower. Hide behind one of the struts and wait for the bot to pass by on its way back, then keep going. Locate the trellis (Tong will send you a message when you're close), climb up to the roof, make your way to skylights further up, get rid of the glass and carefully drop down into the library.
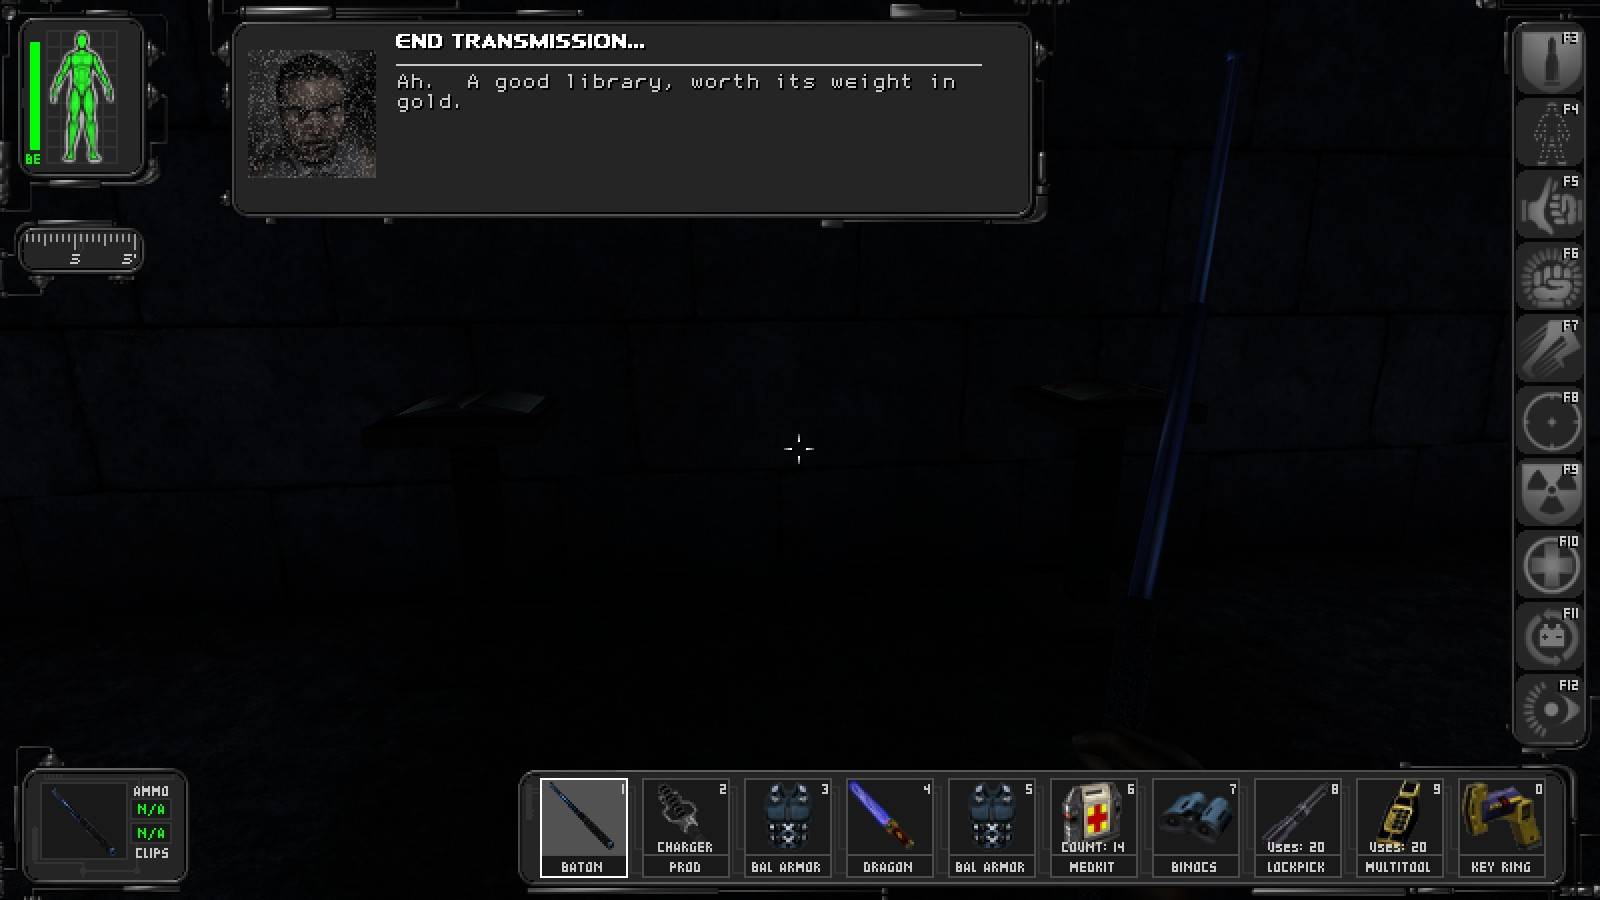
Fun fact, I have 222 eBooks, at least three dozen more regular books, and my father had maybe 400 . . .
If that is supposed to be a good library, then Everett's personal one probably consists of one book... At least there is a key here which opens outside doors of the cathedral, thus making further navigation of the place somewhat easier. From here, take a few steps down towards the quarters - but be careful! There are two commandos down there and even though one of them does nothing but stare at the wall all the time, the other's patrol route actually allows him to watch the bottom part of the stairs once in a while. Since he also walks into cells downstairs and generally cannot stay in one place for any serious length of time, it's best to take him out as soon as he starts moving away from us. Speed or Run Silent aug (depending on which you have you will have to choose whether to run crouching or erect, of course) will probably be useful here, furthermore keeping an eye on the commando's legs from up the stairs will help JC get as close to the enemy as possible without being spotted.
Last but least, watch your distance from the other commando if you want to kill the first one to avoid being heard. Speaking of the other one, he is very easy to handle, so just remember using the baton while not standing exactly behind your target will probably not have the desired effect. Finally, looting time! You have a candy bar and 250 credits in the far cell, 100 credits in the near cell, another door key, 2 bags of soy food, a soda and 100 credits on the common table, yet another door key and a DataCube in the room the standing commando was in. The best haul we have is in the latter, as it contains codes to pretty much all security systems of the Cathedral.
TNT -- there's also a rather interesting, and sad, little journal entry to be found in this area!
Turning back JC will soon find himself in a big stairway. There is a sniper on the landing to the left, looking outside, deal with him the usual way. The only interesting things downstairs are two flares and a commando patrolling the chapel, i.e. next to nothing; with our freshly-acquired key we could also gain access to the other tower via the courtyard area, but as you could see earlier on it's a bit on the heavily guarded side. Upstairs on the other hand, the sky bridge is only guarded by three troopers... Troopers with sniper rifles, granted, but that won't help them much when JC is just a few feet away.
TNT -- at least one of the troopers is standing where he'll see you when you come up the stairs, I'd recommend hopping onto the railing so you can get behind him to use the baton without being seen.
The first sniper patrols the bridge, he enters the rooms at its ends, so all you have to do is hide by the doorway or on the stairs and he will soon present his back to you. The second one is in the far room and is therefore very easy to sneak upon as long as you stay out of sight while crossing the bridge itself. The third and the last grunt hangs out down the stairs from the second one. Unfortunately he sometimes ends up facing the way we are coming from, so if that happens you will simply have to take him head-on.
Now, if you feel like it you can go all the way down the stairs to the kitchen. The chef can give you some tips on how to get around the building, except you probably don't need them; as for goodies, you can grab three bags of soy food, a candy bar, a multitool and a prod charger. Two more bags of soy food and two cans of soda can be found in the adjacent room, where two troopers sit by the fire.
Whether you've been to the kitchen or not, the side doorway in approximately the middle of the big stairway will lead you to a reinforced, keypad-protected door. Use one of the codes from the cloister DataCube to gain access. This is the vault with the gold, but there are two more things to do before it can be considered secured. First of all, the security beams: while you can turn them off using the panel behind the stairs, it will work almost just as well if you push a big crate into them, wait for the alarm to go silent and pass through the gap you have thus created.
Why does everyone leave ways of bypassing their security devices sitting in plain sight?!
Second, the cameras inside the vault: the relevant security terminal is approximately in the middle of the opposite wall, stay low behind crates and you should make it there without problems, then withdraw back to the crates after you have activated the terminal. All done! Have a reward... a single biocell, lying on top of one of the big crates. Don't you just hate it when most of the copious goodies lying around are useless for us? At least there is also a repair bot here.
TNT -- which renders that biocell we found rather useless, doesn't it?
Leave the vault, turn left twice and walk up the stairs. The door to the left is locked and we will leave it like that, but the one to the right will lead us to the room of the WiB in charge of the Cathedral operation. Our hostess is there, but being a gentleman JC will surely insist on her going to sleep without minding him... Although we already have both the door key and the code list DataCube, there are also 400 credits in the smashable cabinet, a security terminal to disable some cameras - and the 250 skill points we have received upon entering.

The cabinet is also vulnerable to explosives, of course!
Having finished your business here go down the stairs and take the doorway ahead. There is another reinforced and keypad-protected door here, unfortunately there is also a shotgun-toting trooper and an active camera with a gun turret nearby. Try to catch the trooper out of the camera's sight to avoid getting shot in the back later on, but even if you did so you'll probably want to smash the camera as well - it has a horrible habit of locking on JC while he is working the keypad (use another code from your DataCube). Once you've got past the door get the fire extinguisher, if you don't have one handy - it might prove useful soon. Also, if you climb up the ladder, walk along the ledge and push the switch in the small room there you will find yourself on the other side of the locked door we encountered just a moment ago, but apart from a handful of skill points there is nothing of interest up there.
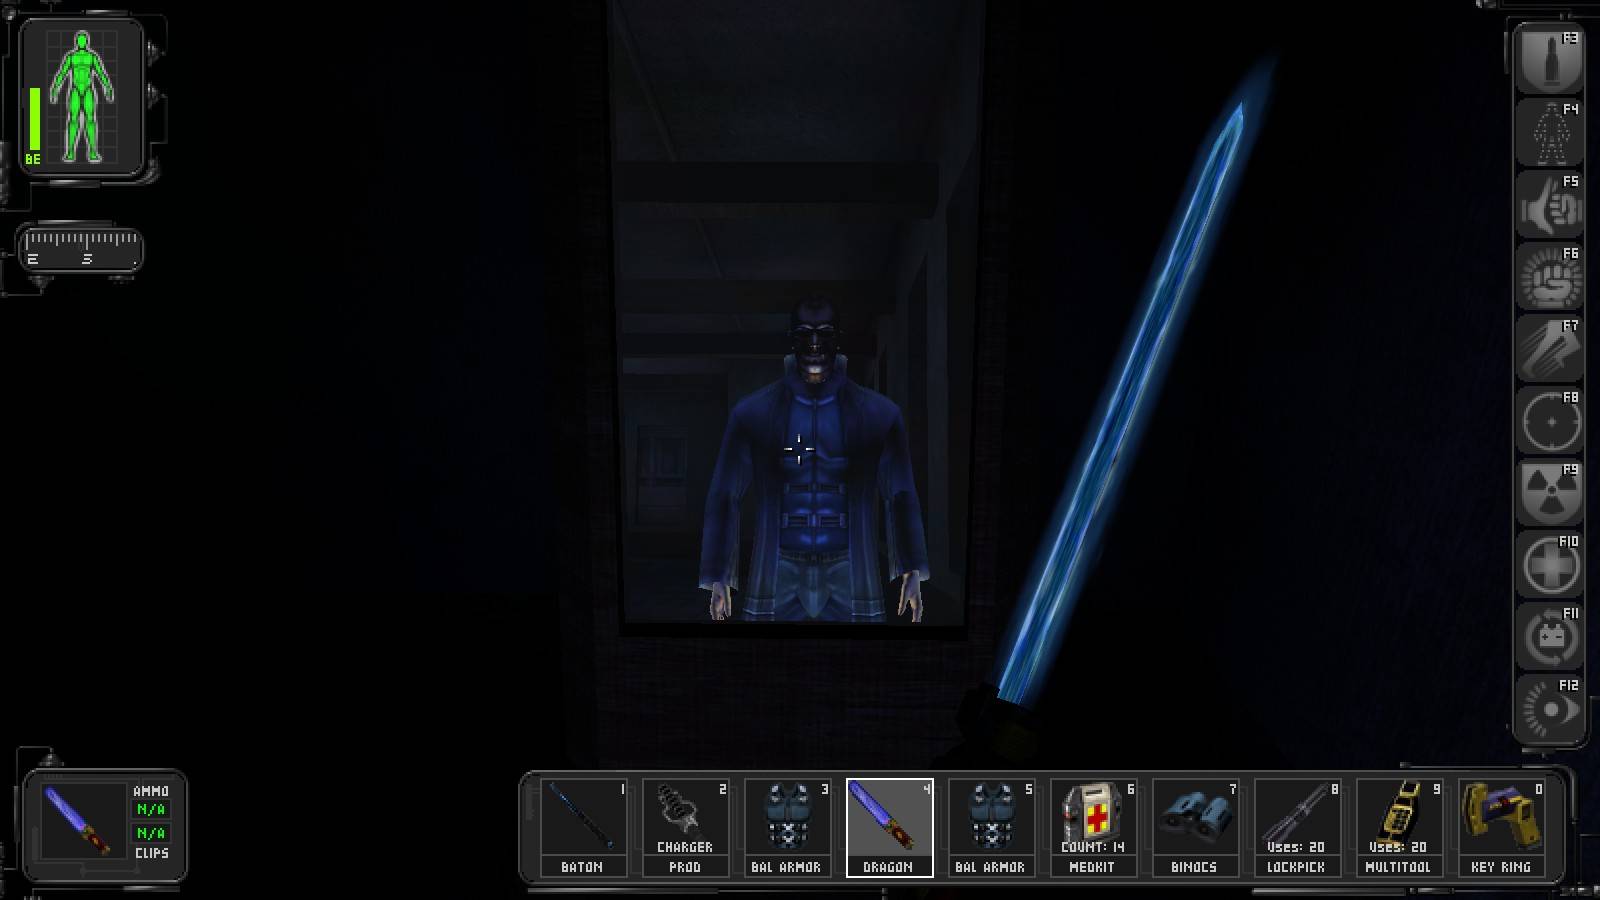
Walk down to the computer room to find Gunther waiting for you. If you have his killphrase you can use it in the conversation. Otherwise, as soon as you're done talking power up all combat augs (hint: you can do this instantenously - from the game's point of view -in the menu or using the "enable all augmentations" key) and go close-range as quickly as possible. You may be set on fire, use the extinguisher if that happens - but for now just keep swinging the Tooth - Gunther is surprisingly vulnerable to melee attacks, so it shouldn't take you long to hear his agony scream. Quickly step back behind one of the pillars and enjoy the fireworks!
Poor bastard . . .
Now you can stand down from combat mode, take care of any possible damage you have suffered, access the computer and get the hell out, stopping by the holotransmitter to hear a message from our favourite psychotic government official. Make your way to the metro station.
We've already scavenged the station for goodies, so all that remains is to take the southern door, go down to the platform and talk to Atanwe - but if you want to get rid of the policemen beforehand, here is what you should do - simply take on each policeman one by one, catching them in places their comrades and the bots cannot see you. This can take patience, as the cops tend to turn around almost every time after they have spoken to JC and they often trigger their conversations automatically when he comes close enough, but it's possible.
A possible approach looks like this. Start with the guy to the north, get him when he's approximately in the middle of the chamber. Move on to the one standing by the door to the south, stand by the door and keep talking to him until he ends up facing this way, then walk up to the patrolling cop nearby and take him out while he is between the back of his colleague and the pillar hiding him from the nearby robot. Finally, the last guy cannot be taken out without alerting the bots, so talk to him again until he faces away from the door, nab him from behind and leg it downstairs before you get shot up. That's more-or-less it, the remaining cops on the way to the platform are easy. Talk to Toby.
Why Having a Private Helipad on Your Roof Is Not a Good Idea While Trying to Stay Unseen
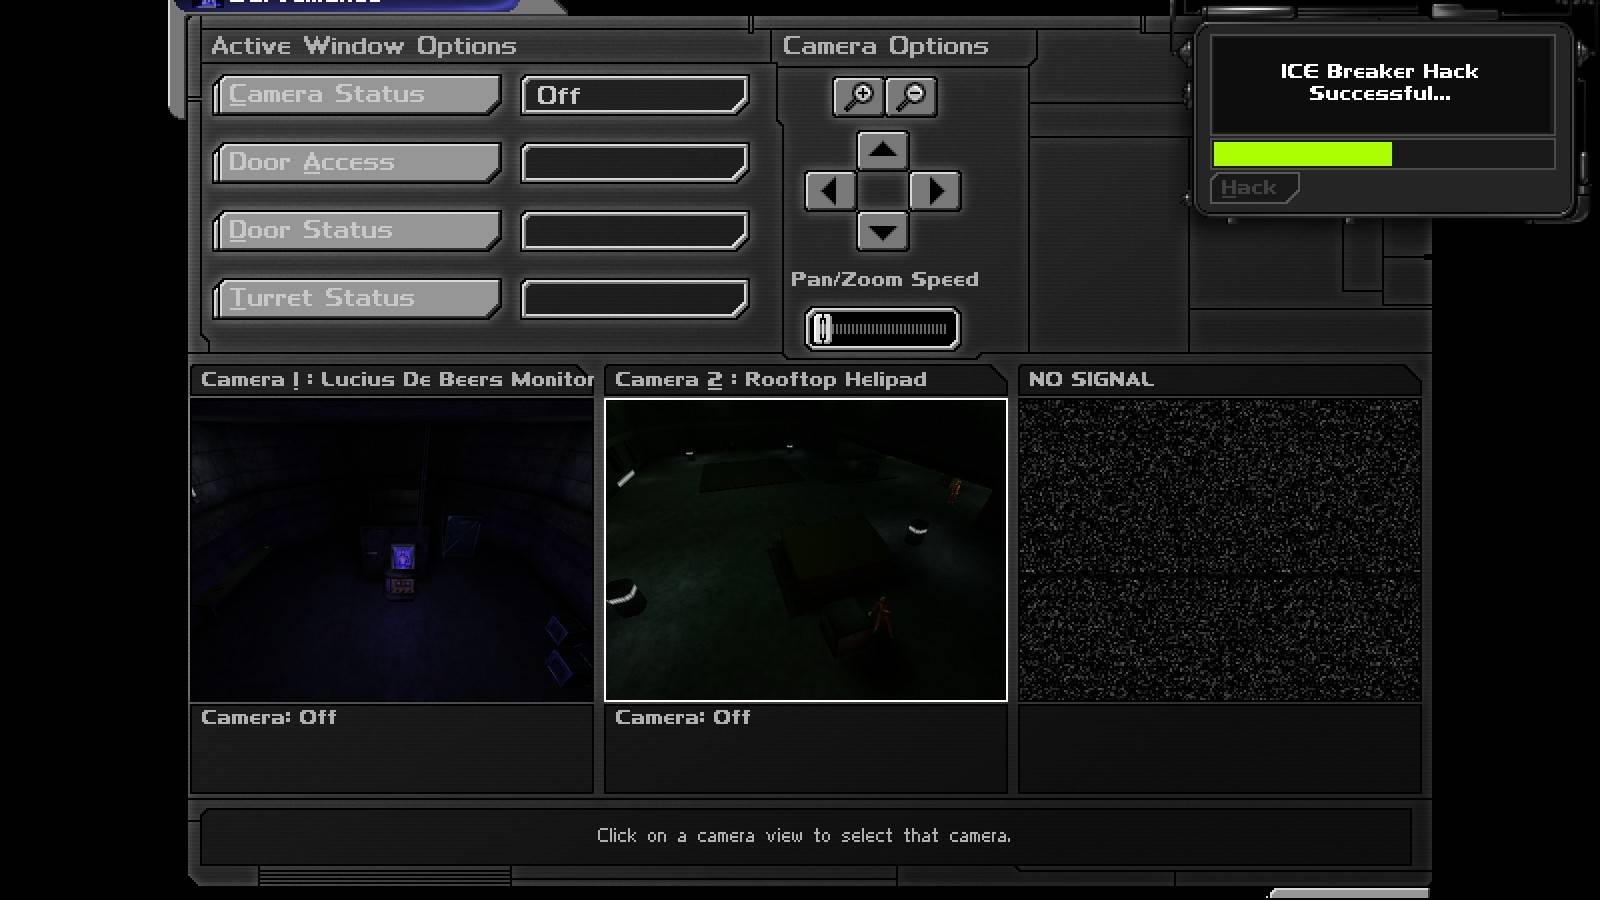
Thank Atanwe profusely for his trouble lugging us to Everett's apartment, put him down next to the maid (what do you mean, she isn't down yet?) and start looking for pieces of that legendary Illuminati wealth we can put to better use. A search of the kitchen will yield a pair of binoculars, 2 bags of soy food and 100 credits, whereas 100 more credits can be found in the nearby bedroom. Next room is the bathroom where, in addition to a candy bar, a medkit and a key to Everett's aquarium, one can find an interesting moving mirror... The gate behind it is locked, but will accept superiority of the Dragon's Tooth. Go inside to talk to a really cool guy and collect 100 more credits and a DataCube with an access code to someone called Morpheus. There is also a security terminal on the wall en route - see anything suspicious on the helipad?
Hmmm . . .
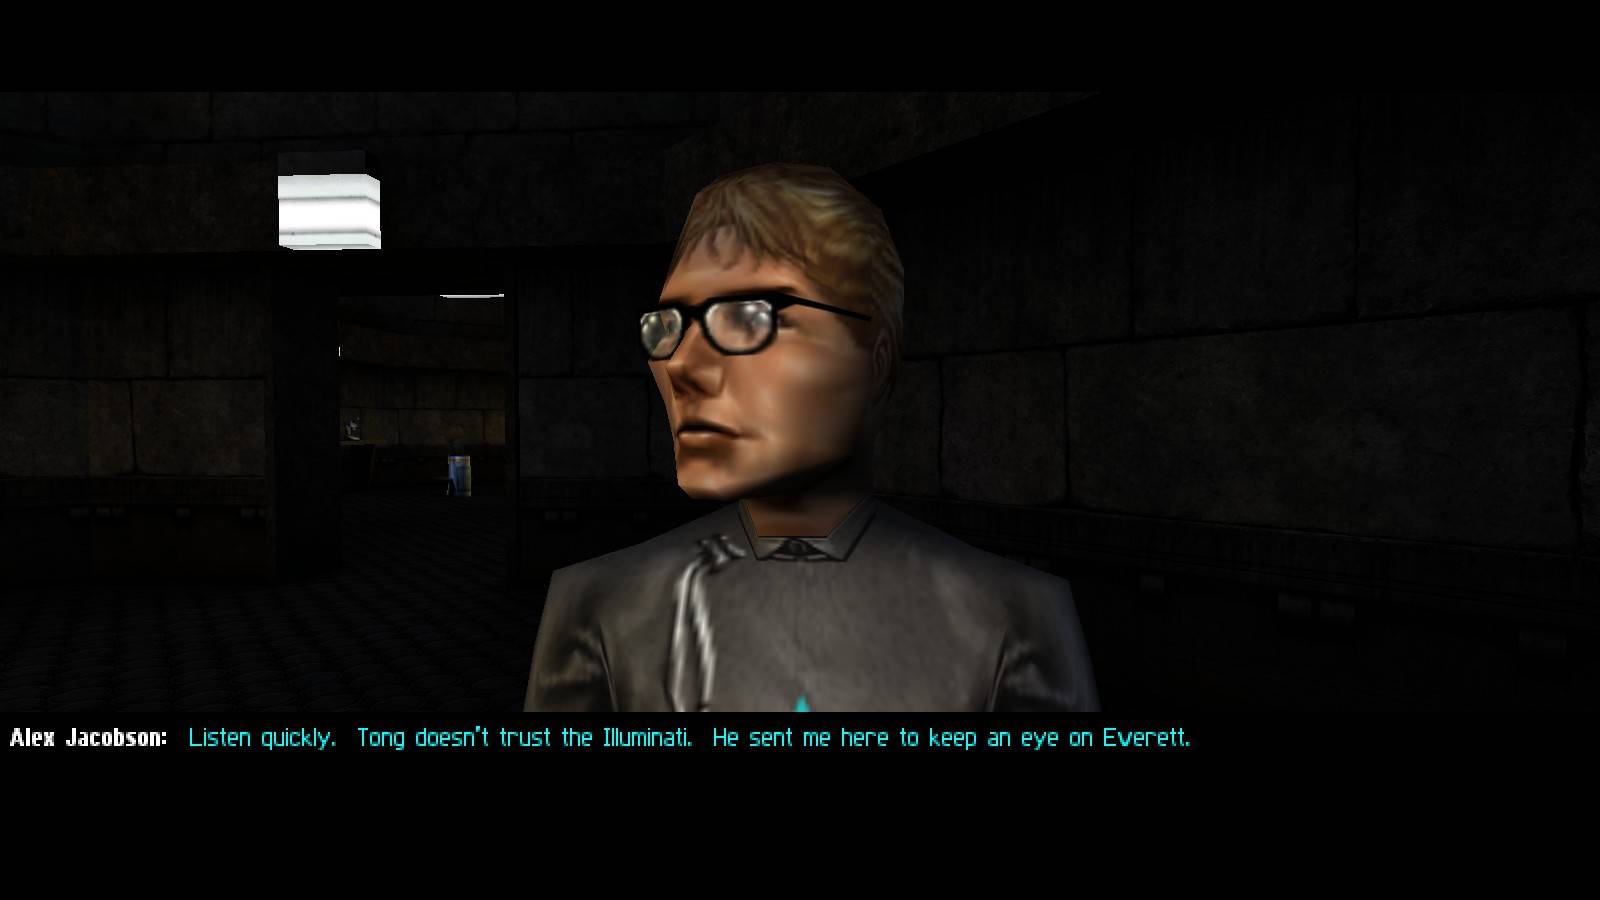
Do something we have been asked to do for change and go down to the lab to see Everett. On our way we can collect two prod chargers and use a repair bot in the dark room with pillars; you can also stop by Alex to learn about the wonderful spirit of co-operation, as well as to grab a biocell off his table and swipe an access code to augmentation containment in the lab off the computer.
Last but not least, the most interesting distraction is the room behind Alex - apart from a med bot, a DataCube with Everett's login data, a soda and another biocell there is a heavy door which can be opened using the code from DeBeers' room. So that's Morpheus... Talk to "him" for a while if you want to, plus you can get another biocell and a key to where Lucius is (yes, to the gate we have smashed to bits). Finally, on to Everett.
Talk to the man several times until all topics of conversation, including Lucius and Morpheus, have been exhausted. As it turns out there doesn't seem to be much left to do here, so let's go back to what JC does best - looting. The containment units, having been opened either with the code or using the nearby terminal, will yield Vision and Ballistic Protection augmentation canisters and one upgrade canister. The cabinet by the windows, despite being quite full of things, from our point of view contains only a multitool. Last but not least, there is an access hatch to the aquarium which we can unlock with the key we got earlier and go pee into the water, or at least swim to the other side and get the rebreather lying there.
Stop by Lucius on your way to the helipad. It is up to you to decide whether you want to tell him the truth or not and whether you do what he asks if you did. Myself I always do because I like pissing Everett off. Once by the helicopter, talk to the mechanic. Let's see: a body of another mechanic on the floor nearby, the guy is obviously nervous... Better talk to Everett about this. If you confront the imposter afterwards he will start running and eventually turn hostile, if you let him that is. When you talk to Jock he will find a little surprise in the cockpit.
Alternatively you can not bother with the whole thing and get on board of the chopper immediately... with appropriate consequences later on. Either way, it's time to go back to the US and start kicking some larger butt.
TNT -- so, let me get this straight. Morgan Everett doesn't want JC to know how to get to his home, but he A) gave the location to Jock, and B) is going to let JC fly away while conscious, which will reveal the location of his home??Top of page