- Home
- Walkthrough
1. New York 3. Return to New York Liberty Island Return to Hell's Kitchen The Warehouse Assignment The Wall Cloud, The Graveyard Ambrosia, Airfields, and Apostasy 4. Paris The Insurrection Finding Nicolette The Great Escape Finding Morgan Everett 2. Hong Kong 5. Southern California The Helibase Vandenberg Deactivating the Kill Switch The Gas Station Versalife The Submarine Base The Missile Silo Area 51 - Strategies
- Extras
Paris, Part I
Introduction
This portion of the walkthrough will get you as far as finding Nicolette -- Part II covers searching the chateau and everything up until you leave Paris. There's nothing overwhelmingly difficult about Paris, you shouldn't have any real trouble with either section. As for invincible AIs, we have Jaime Reyes (if present), and Nicolette DuClare.
Sewers, Greasels and Crazy Ladies
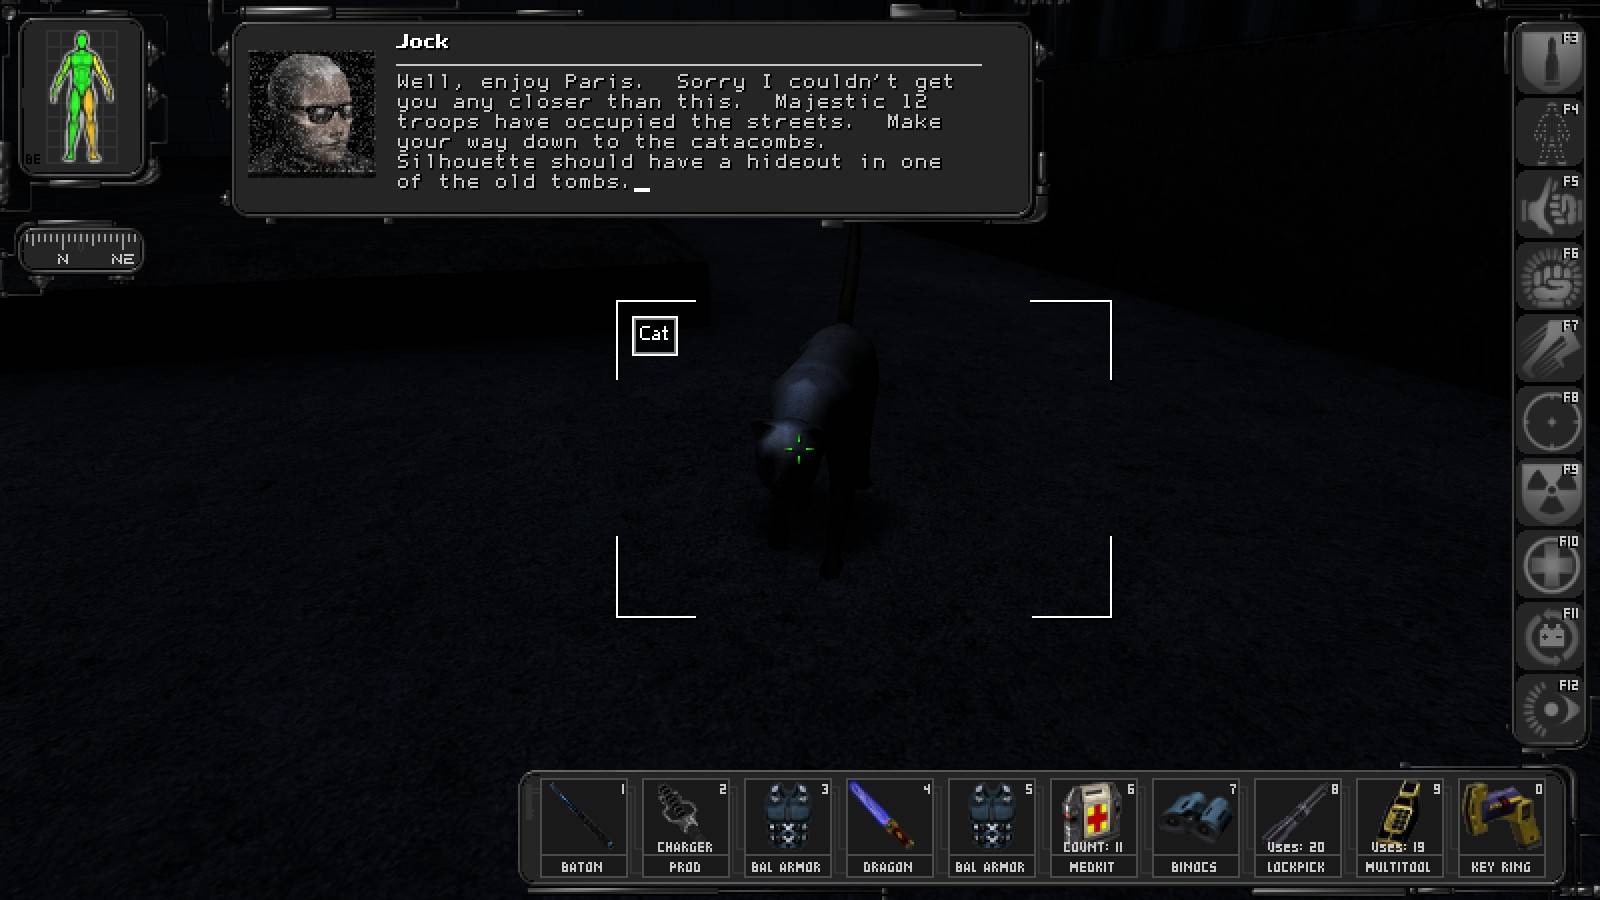
KITTY!!!! Watch your step, you can kill them by stepping on them . . .
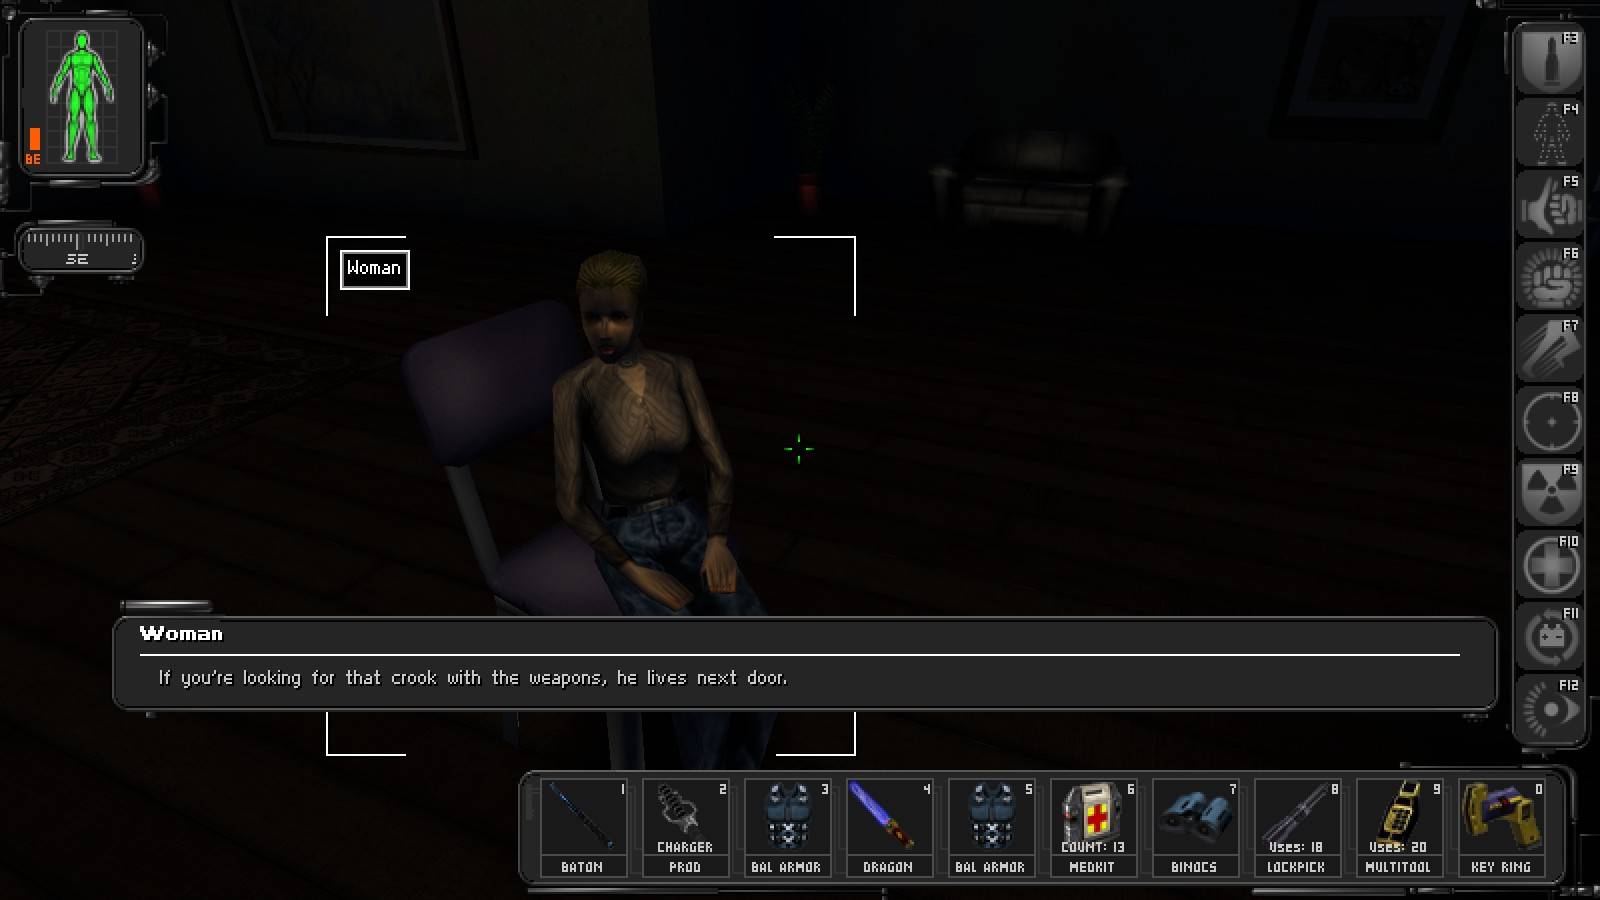
Jock has dropped you at the roof of an unfinished high-rise not far from the catacombs, so we need to get down to the ground level first. The code to the service lift can be found inside the small shack, but the door has to be picked and the only other stuff to be found there is three flares, so why bother? Simply walk down the twisted beams inside the open shaft until you have reached an open door. Hmm, tonnes of alcohol scattered around the whole building... and kitties! Go up the short stairs and ahead and you'll meet their mistress, appearing somewhat distressed. Talk to her, help yourself to the food if necessary, then swipe a biocell off the cupboard, along with a lockpick and a medkit from a small mezzanine you can reach from the cupboard by walking up the fallen beam.
Get back to the lobby and climb down the ladder inside the service lift shaft; halfway down you might get a hazmat suit by entering the main elevator shaft through an interconnecting passage. Follow the tunnel, possibly picking up a lockpick and two flares en route, to find two moveable panels leading to the room full of radiation Aimee was talking about.
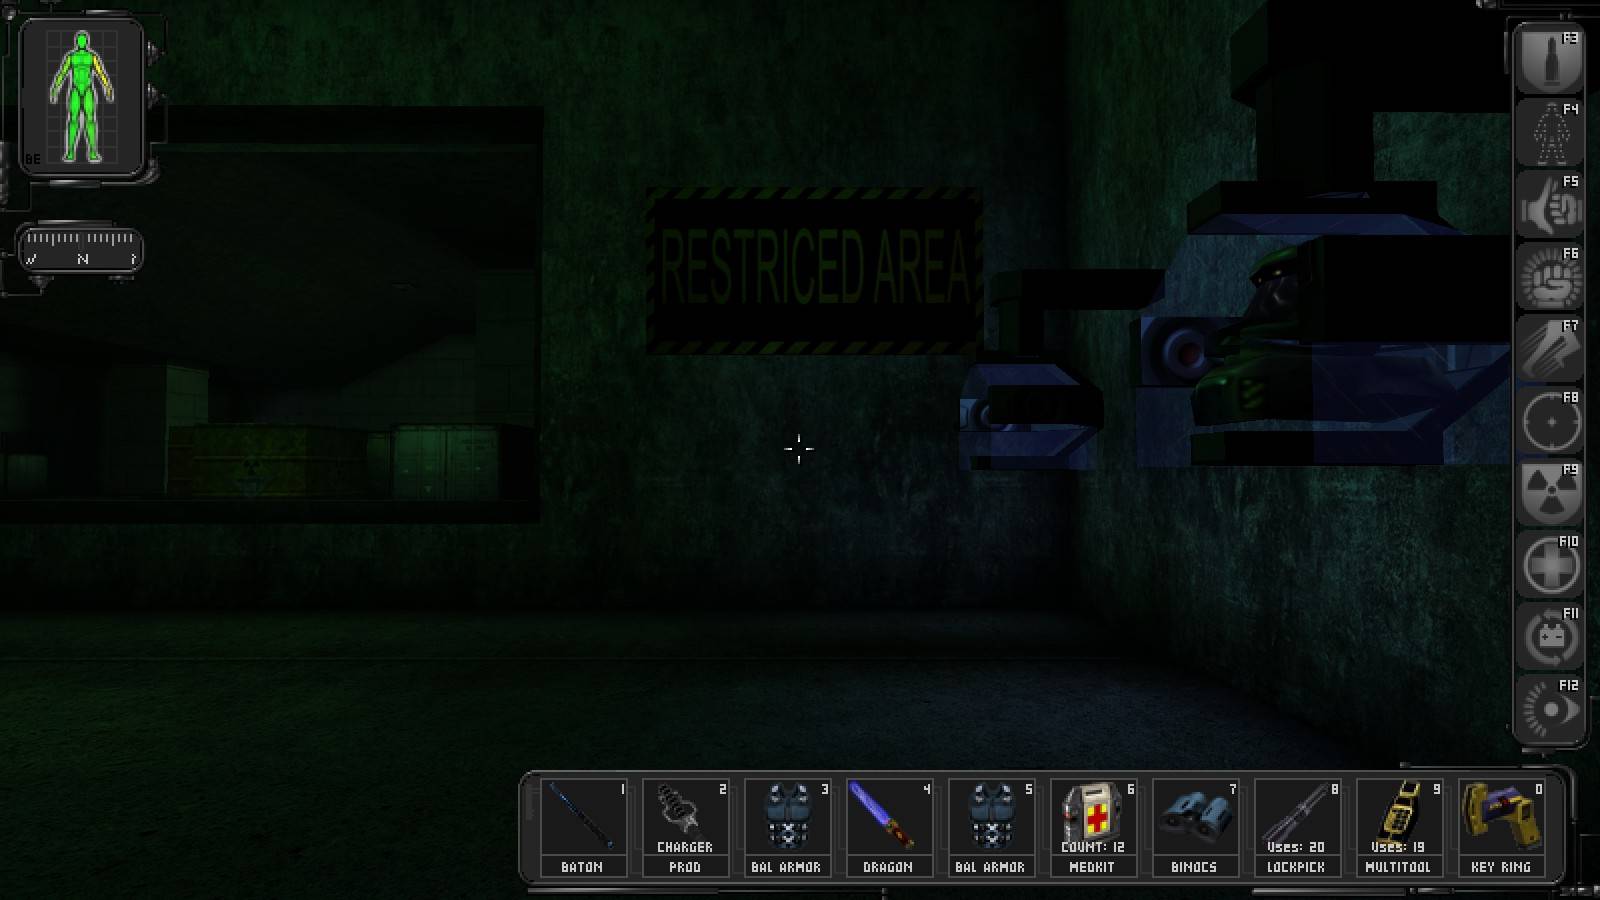
At least there's a way to get past! Also, is it just me or is something missing from that sign?
The second one is locked, but can be destroyed and is closer to the exit, so take that one. Use the repair bot if necessary, then go down into the sewer. Another InfoLink message? Bloody Tong, can't he shut up for... Yikes. Anyhow, it's time to hunt some greasels!
Of the four creatures hanging out in the sewer, only two actually patrol it: one near where you are now and one further into the tunnels. The other two stay in a niche in the northern east-west tunnel, feasting on animal carcasses, and should present no problem. Once all four have been taken care of, get back to Aimee; should you decide to use the stairs to go up, a quick search of their bottom landing and the neighbouring area will yield another hazmat, a fire extinguisher and three flares (not to mention a multitool and a medkit in the radiation room itself). What the...

Someone please explain to me how the cats accessed the keypad to open those doors in the first place?? And shouldn't she still be a wee bit worried about her kitties being irradiated??
Even though the quest has proven useful thanks to the 200 skill points we've just got, put the silly woman to sleep - she has four multitools. Finally, get back to the sewer, go all the way to the end (there are two lockpicks en route, one in a crate and one in a small wall inlet a bit earlier) and climb out.
Hide behind crates (don't bother with the tech goggles) and bop the nearest commando when he's close enough and facing away. The other two spend a lot of time on the far sides of the courtyard (one walks counterclockwise round the catacombs, the other - clockwise round the building to the south) and can therefore be left alone, if you feel like it. The building to the south is the one Aimee was talking about.
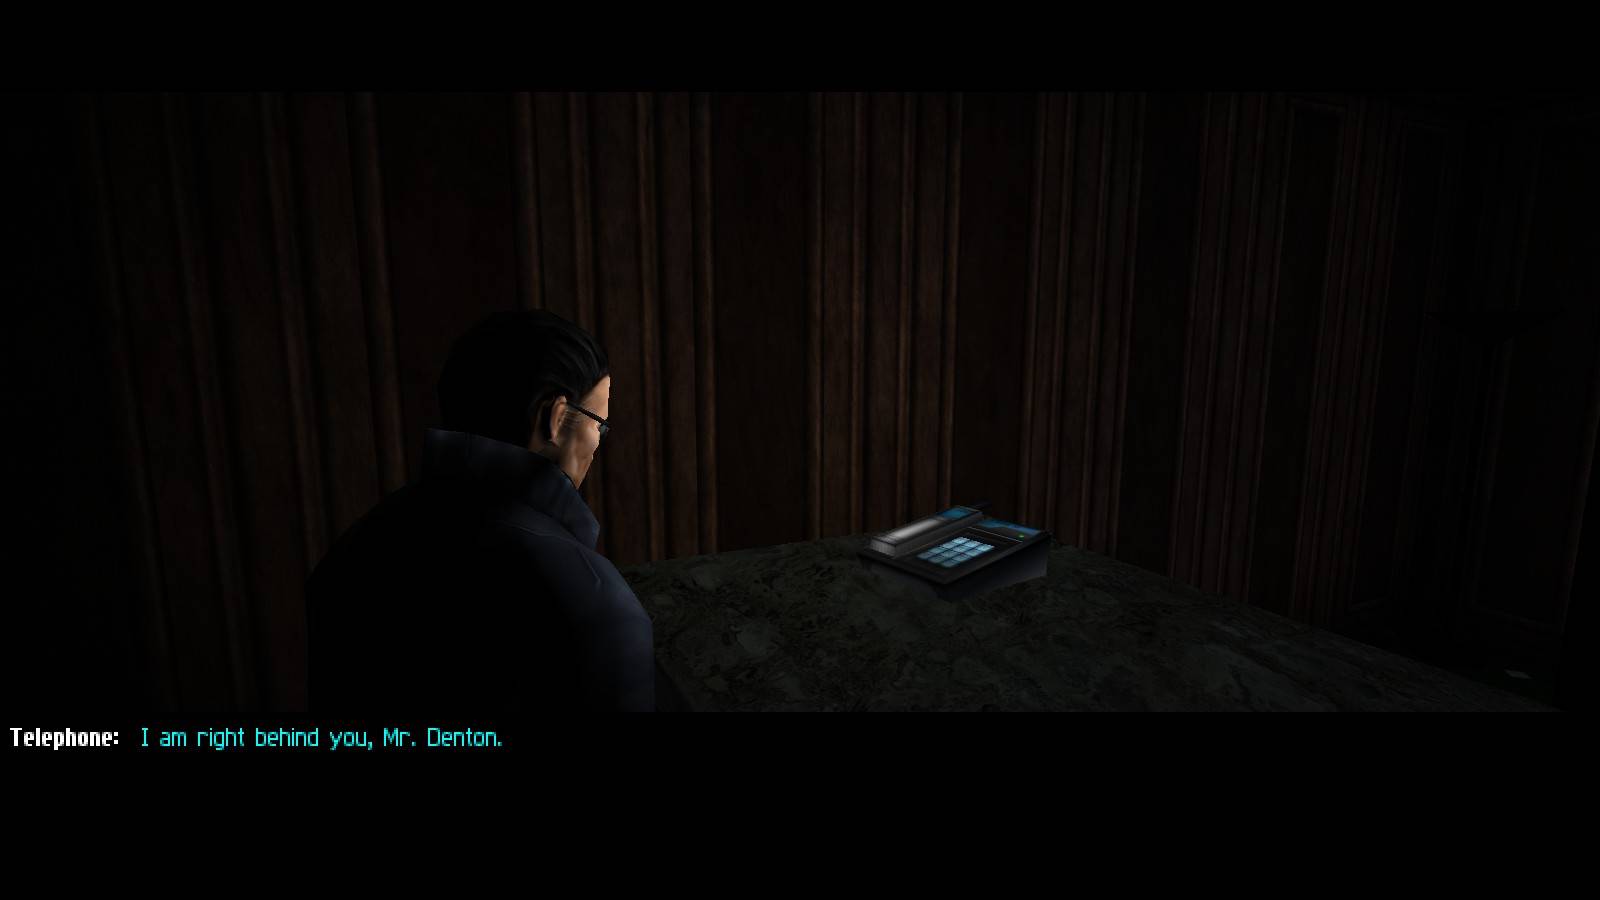
If you pick the lock you can raid it for some goodies upstairs (food, an extinguisher, binoculars, a water cooler and a smashable cupboard containing a login to the terminal in this room and a key to the warehouse downstairs), downstairs (a biocell and an office key) and inside the locked office (a DataCube with account details under the desk; you can use this information by going to the metro station just outside and power-smashing the camera watching the ATM ahead), a repair bot in the warehouse and a minor yet interesting addition to the plot (answer the phone in the locked office once you've got inside...).
Well, things are getting decidedly eerie here . . .
On the other hand, the catacombs can be accessed in three ways: by picking the lock, by opening the door using the key the southern commando carries or by going round the back and removing the boards off one of the windows. Once inside, get the map of the catacombs along with three flares (one near the map, two at the back) and proceed down the spiral staircase.
Those in dire need of a challenge may also decide to explore the metro station. To be honest, the only vaguely interesting things down there other than the ATM and the flare lying on the floor nearby are a medbot and a fire extinguisher (which we most likely don't need) plus a news terminal with some interesting messages (which can be found in other Paris locations too). On the other hand, trying to complete the task given us by the arms dealer means either wasting many lockpicks on locked air vents or pulling an almost-frontal assault.
Still, if you want to do it, I'll describe the latter approach. Simply wait for the bot to start heading away from you, enter the room to the west it's just left and crouch under the water fountain on the wall. After the bot has come back and once again has its back towards you leave the room and go down the corridor, then kill the two troopers guarding the office door. Congratulations, have a security terminal (which you can use to cunningly disable the camera we've just... uhh, never mind) as a reward.
Waking the Dead, Killing the Living
Note: all troopers in this section carry soy food and all commandos carry biocells. Take that into account when trying to move bodies in a hurry.
Keep following the path until you have reached a round room with a pillar in the middle. The main exit is protected by a gas grenade we can disarm just in case, but there is another one further ahead. Collect the lockpick you can find there and follow the narrow tunnel to listen to two troopers discussing their commander. Someone sneaking up on you, eh? This can be arranged...
Once you're done here (more soy food; whee), follow the main corridor (which is patrolled by a single trooper and contains two flares and a candy bar). Get through the hall with pillars guarded by a commando and to a dead end with a flare on the floor, a lockpick and a locked blast door nearby. Push the brick the lockpick lies on to enter the Silhouette bunker.
Chad is waiting for you in the central area of the bunker. Talk to him and you'll receive a new assignment, along with a key to the locked blast door. Another copy of the same key can be found inside the cupboard nearby along with some reading material, so considering the cupboard has to be picked open don't bother with it, just get the medkit off the top and two flares off the floor. Restrain your urges to start bopping Silhouette members; it's possible, but you'd better leave it for later. For now get on with your work.
Right behind the blast door the tunnel branches to the east and to the west. The eastern tunnel is patrolled by a commando, make sure you take him out - even though the rescued hostages normally take the western tunnel on their way out, they start behaving extremely stupidly upon encountering any opposition. Two turns later, where the two branches join again, smash the trunk on the floor to obtain a prod charger and a DataCube with the local security login. There is also soy food and a candy bar nearby.
Proceed to the north and you'll find another branching with a flare on the floor - if you turn to the right you'll find the second bunker where, in addition to two vials of Zyme and two bags of soy food, you'll find a bum. Talk to him, but don't buy anything - you can get his medkit plus a candy bar from his unconscious body. Return to the main corridor and keep going (another flare on the way) to the next fork, turn left, then left again at the next fork to enter the MJ12-controlled area. Other stuff to be found in the tunnels are a can of soda and another flare in the dead-end tunnel where the original exit used to be (but watch out for the live LAM on the wall), plus another soda past the final fork, near the locked blast door leading to the sewers.
The ledge mentioned below.
Having gone down the stairs you should see a trooper on patrol. The room to the east contains two lockpicks and another DataCube with the local login (up on the ledge which you can get onto from the central room). The only interesting thing in the room up the stairs to the south is a soda can (the trunk can be smashed open, but contains only various crossbow darts). Our path continues to the west, where we'll encounter another trooper. If you go down the stairs to the south and then up the ladder, you can smash open a fence gate to release a repair bot and, if need be, scavenge a multitool and tech goggles from beyond the broken electric box it will have repaired. On the other hand, the way to the north is guarded by tripwires; although we could disable them, it is much faster to crawl past the cross at the intersection and enter the bunker via a hole in the wall.
The main part of the bunker is guarded by two commandos walking back and forth along their respective paths on opposite sides of the central room (which means one of them walks by the entrance, so make sure he won't notice you). There are also two stationary guards on the two rounded ends outside the central room and a trooper on patrol to the northwest, plus a camera and a turret watching the entrance to the next room.
The fastest way to take care of them is to take out the first commando while he has his back towards us and heading north. Then, sneak up on the southern stationary guard when the second commando is not looking, move back and wait for the latter to turn away from you (be fast, if you wait too long you'll have to deal with him in view of the camera). Take care of the northern end of the room, starting with the stationary guard (be very fast while dealing with the patrolling one, his patrol route is very short and he turns around before stopping, thus being able to see us).
TNT -- I found that leaving bodies lying around actually made this area a lot simpler, they're very handy as bait! Either they'll run straight to the body and stop to stare at it, or they'll run straight for an alarm panel, either way it gives you a good opportunity to attack.
Though some aren't particularly upset by what's going on, curiously enough . . . advantages to a non-lethal approach!
Now, although we could simply smash the camera and walk to the next room, there is a better way: walk back to the entrance area and take the flooded tunnel all the way to the far end of the MJ12 command post. Get out of the water, hide behind the crates, and knock the WiB out when she's close enough, taking care not to get noticed by the commando walking counterclockwise round the main section of the room.
So near, and yet so far . . .
Once she's down you can take care of the latter, along with his companion walking back and forth upstairs, or simply get to looting the place. There is a key we need on the table, along with two prod chargers and some reading material, the crates we were hiding behind have tech goggles on them, the terminal nearby can be used to shut down the camera and subvert the turret and there is a biocell upstairs. Finally, use the key on the blast door to the central room, let the hostages out, swipe a multitool from the trunk under the hole in the wall we entered through and follow the hostages back to the Silhouette bunker, protecting them from enemies if you left any standing.
TNT -- curiously enough the hostages can run through the laser tripwires on the way out the door, but of course JC will trip the alarm if he tries it and wind up with a turret perforating him in very short order. If you haven't hijacked it, I would highly recommend power smashing it.
Having talked to Chad and received the information we needed, we are ready to move on - but psychos and people holding a grudge against the French may be interested to know that it is possible to take out every single person in this bunker. Yes, including Chad!
TNT -- the proper method is to make sure there's nothing left of Chad except giblets. It makes his appearance in Deus Ex: Invisible War all the more amusing. You can still do that, just hack at his body with the sword for a while!
One thing to remember here is to start with the shotgun guys, as they get angry if they see anyone else under attack; on the other hand, everyone else doesn't give a damn about shotgun guys.
Get to the locked blast door past the entrance to the (former) MJ12-controlled area and unlock it with your nanokey ring. Keep going (if needed get a lockpick from the pool of water in a room not far from where you receive a message from Tong) until you've reached Champs-Élysées.
Things to do in Paris when you're a bloodthirsty superhuman with a sword
Actually this is only the neighbourhood of Champs-Élysées, not to mention at the moment JC is still in the sewers, but we're hardly in a position to complain. If you go east at the fork (you can get a fire extinguisher there) and peek out of the manhole you can trigger a conversation between MJ12 troopers, but you'd better get back down fast - this place is heavily guarded, not worth the effort considering there is another way.
TNT -- if you're a masochist, you can survive a frontal assault -- in fact, I thought this was the only way out of the sewers before this part of the walkthrough was sent to me. Also, if Jaime is meeting you here, you'll receive a message from Tong informing you as you enter the sewers.
Head west, collect lockpicks from crates if necessary, then smash the cover on the manhole at the end of the tunnel. Get out and quickly take cover (there are some boxes nearby which will do just fine for that purpose).
Do be careful about sticking your head out of the sewers though . . . you can probably guess how my first attempt to exit to the streets ended!
The impatient can now proceed straight to the club Silhouette members hang out at, as it's right down the street to the south and even with enemy presence can be reached easily. This whole section can be finished in under 5 minutes without missing much (unfortunately most things that can be found exploring here are useless for melee-only players). However, considering our highly psychotic ten... I mean, concern for well-being of the innocent, let us first see how we can make this part of the world a safer place for people in baggy trenchcoats. The breakdown of the enemies in this section is as follows:
- two military bots, one on the east-west street and one of the north-south one
- two patrolling commandos, following more-or-less the same routes as the bots
- two standing commandos, at the eastern end of the E-W street and at the southern end of the N-S one
- three troopers and a dog hanging around the eastern manhole, then another one patrolling a bit further to the east
- two patrolling troopers at the southern end of the street, one right there and one walking around the columnade off to the west
- a security bot in a courtyard between buildings off to the west from where the two main streets meet
There are also some French policemen in the area, but since they remain non-hostile as long as they don't catch JC breaking the law (which unfortunately does include bashing heads of MJ12 soldiers), they demand less attention at the moment. The most dangerous enemies in the area are obviously the military bots, so let's take care of them first. Fortunately for us they can be disabled using the computer in the security shack east from where you are now; if you cannot hack it, you can get a login by chatting to a family at the cafe to the south. Also, the shack contains a biocell and a DataCube which ought to contain a map of the area, but unfortunately doesn't.
With the bots off-line, feel free to dispose of the two patrolling commandos as they come out of sight of their buddies. Note that the north-south street is also patrolled by a cop, so make sure he doesn't catch you red-handed; on the other hand, if you manage to catch him your efforts will be rewarded with a medkit. Now head south, between the buildings to the west as soon as you can (but watch out for the security bot, it hasn't been shut down) and then left to the columnade, where you'll be able to take out the patrolling trooper and proceed back east. Wait for the commando to turn away if necessary and take out the trooper (this one has also got a medkit), then the commando himself; make sure the cop walking around the bakery (the low building on the other side of the street) doesn't see you doing this. Help yourself to the armour from the crate, if need be.
If you don't count the policemen (in addition to the two mentioned above, there are 6 more: two between buildings not far from the security bot, one by the entrance to the club, one by the northern entrance to the metro, one outside the hostel behind the bakery and one in the hostel's lobby), that only leaves us the happy bunch behind the security shack. They are somewhat hard to tackle because they stay so close to each other and besides it's not really necessary to go there after the bots have been disabled, so if you don't feel like it just skip the next paragraph.
Otherwise, walk east first and approach them from the south, which will put you in a relatively dark area between the shack and the standing commando. Take him out first, when the patrolling trooper has turned his back on you; note that since it's not possible to get exactly behind your target, it's better to use the prod here instead of the baton - the guy may remain standing having been hit with the latter at such an angle. Anyway, quickly pull the body behind the corner and take care of the trooper, who by that time is probably back in your range. You are likely to get noticed by the dog doing that, but that's okay - it will make it easier to get rid of it next (otherwise you'd have to sneak up on it, taking care not to be noticed by the other troopers).
Finally, there are the three troopers - two facing one way and one facing the opposite one, so we are more-or-less forced to reveal ourselves. Surprisingly enough we will start with the one facing the opposite way, as even though that will most likely cause both of the other two to get alarmed, the former packs a flame thrower and is therefore quite a nuisance. Stay close to the other two (one carries a LAW and will fire it if you get too far away from him) and finish them off in open combat, then we're done. A piece of random trivia: not far from where you are now is a monument, if you explore the corner behind it you'll find a can of soda and a bag of soy food.
Even though exploration is not particularly rewarding around here, it still won't hurt to look around, will it? One place in particular that is worth visiting is the cafe, as that is where you will find Jaime Reyes if you asked him to stay with UNATCO earlier on; he will give you Gunther's kill phrase.
There is also the French family of three there you can get the bot station login from (don't shoot your other son? This can be arranged...), the owner (French people have some strange ideas...), the chef and his assistant (outside). Not too many goodies here, just 2 bags of soy food and 3 cans of soda (one of which is outside), but there is a DataCube in the kitchen which contains account data we can use.
Speaking of ATMs, there are in fact three in this area: the two not far from the back door of the cafe are rather obvious, but there is also one inside the music shop across the street, which yields quite a sum when hacked. However, considering the door of the shop must be picked open and the only other thing inside is a multitool on top of one of the shelves, it's not really worth the cost.
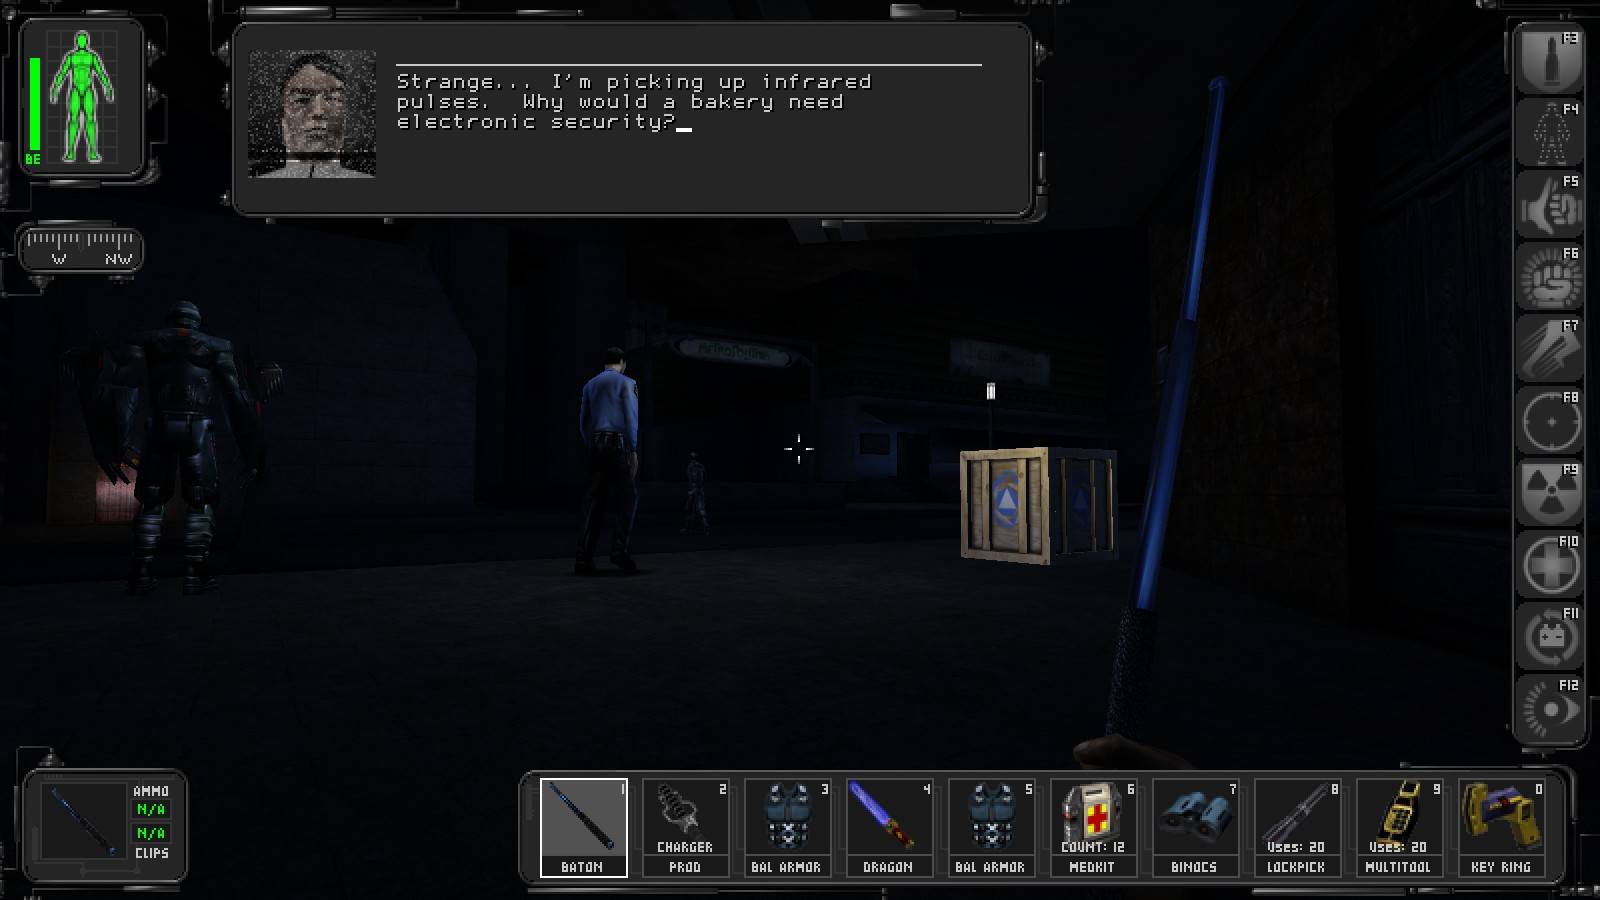
The next spot of interest is the bakery next to the music shop. Noticed the message from Tong about security systems he detected on the back door (which, by the way, is unsmashable)? Interesting... Too bad for them the front door is neither alarmed nor reinforced. Inside you will find a crate with a lockpick and, inside the oven, 6 vials of Zyme (unfortunately you probably won't be able to pick up all of them, if you kept collecting the stuff throughout the game) and 100 credits.
After raiding the bakery, head to the next building in our path - the hostel. The manager is not particularly helpful, even considering we have already found out where to go, so repay him for his trouble with a bop to the head so that he doesn't complain when you relieve the cop in the lobby of his binoculars and candy bar. Once happy, head to the bar in the back: turns out the guy sitting there has an interest in the Zyme we just nicked... Go ahead and sell your stash, even if you want to keep it - you'll get it back when you take the guy out. That will of course make his bodyguard unhappy, but you know what to do. The bartender had it coming as well with that patronising tone of his, bet you don't feel so smug now, eh? ...ahem. Go back the lobby, up the stairs and to the balcony overlooking the bar, grab the room key from the cart and use it on the locked door nearby to get 100 credits, a biocell and another bank account number. Not much of interest left here, so head out.
The last two places to visit here other than the club are two apartments between the club and the hostel. If you ask me, they are not really worth wasting lockpicks on, but for the perfectionists here is what you can find.
An arms dealer leaves in apartment #11, which unfortunately means the only things of any use to us are 100 credits and another account number. In #12 are 2 packets of soy food and a couple in conversation downstairs, 100 credits (on a table to the southeast), binoculars and a multitool (on balcony), biocell (under the bed) and a cupboard containing a medkit, 200 credits and yet another account number, upstairs.
Apparently there are a lot of illiterate burglars in Paris!
That's pretty much it around here. Talk to the janitor by the back door to the club and possibly relieve him of a multitool and a biocell, empty any accounts you still haven't taken care of and enter the club via the front door.
Da Cloob, Boss!
Considering that by the time JC reaches Paris he already has to carry a small fortune you may just as well pay for the ticket... not! Let us continue our antisocial spree and sneak into the ticket office via the smashable vent earlier in the corridor. There are two club door keys there if you want them, one on the guy (together with a lockpick) and one on the table (together with a soda and some soy food), but instead of going back simply keep going down another vent, through the restroom ("you'll go complain?" I DON'T THINK SO!) and another vent to the club's office. While we wouldn't be interested in the address of the arms dealer even if we hadn't been there yet, the suit does carry a lockpick we may find useful - even if only to unlock the unsmashable door in the room (note that for some reason it can actually be open at times, in which case make sure you don't accidentally close it!) and swipe the biocell that is inside.
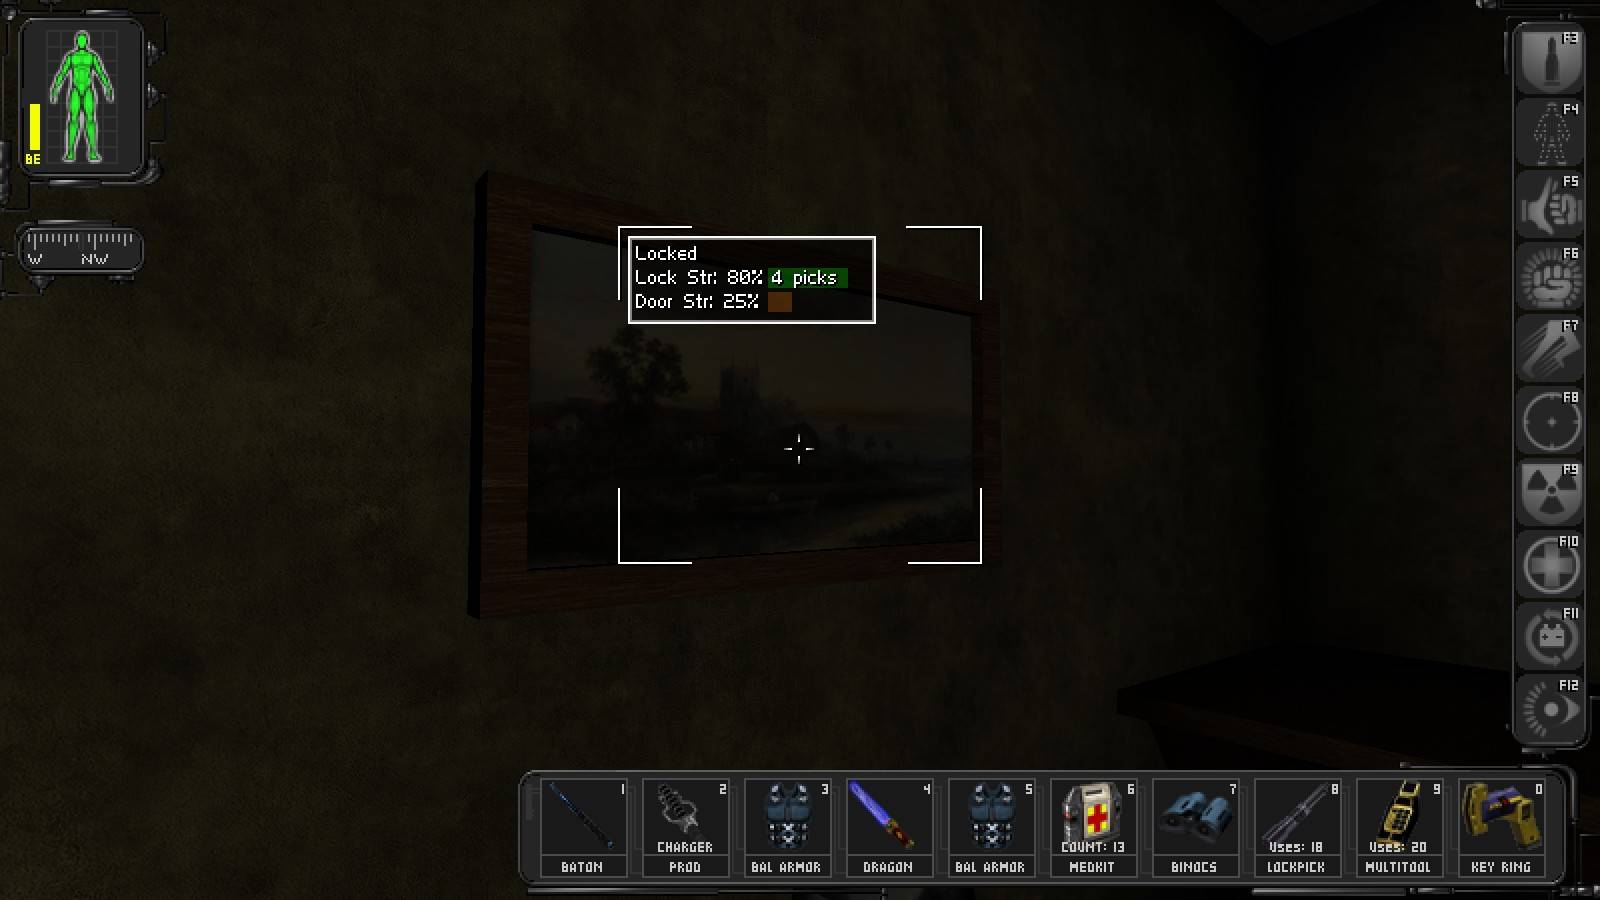
Moreover, destroying the picture on the wall with the vent will yield 100 credits, a biocell, another club key and a DataCube with a code to the nearby storage code - which in turnn contains a medkit, a prod charger, four bags of soy food, another 100 credits and thermoptic camo. Ignore the back door and head to the main club area. Apart from several conversations to have and a guy selling biocells with a bag of soy food on his table here isn't much of interest, so unless you feel like bashing heads again - everyone here can be taken out, if you want to try - simply head upstairs, talk to the girl in purple sitting at one of the tables there and leave. The girl will appear again behind the club just like she said she would, talk to her and get out of there.
TNT -- be sure to wave at Gunther! And just for fun, why not exit through the front door and taunt the door man?