
Walkthrough
Operations
Preliminaries / Top
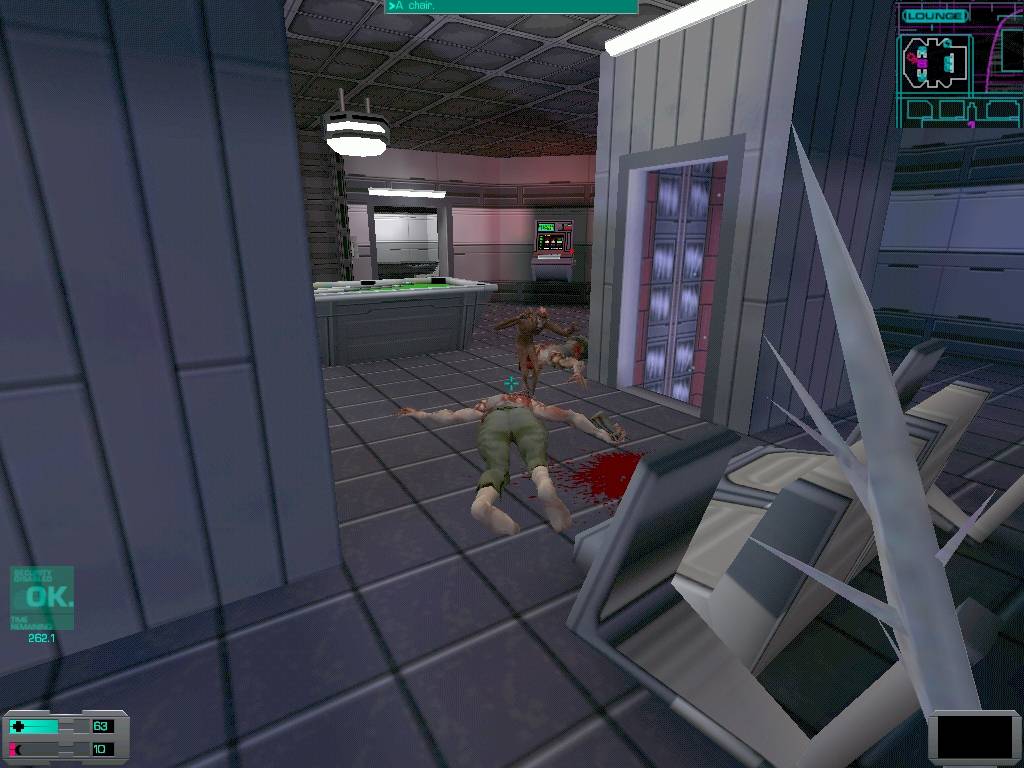
When you get to Deck 4, there's really nowhere else you can possibly go but bulkhead 41. It's directly to the right of the elevator. Walk through the door, and stand by the female corpse in the chair, to her left, with the desk to your right. It's the best view to watch the following scenes in. Take out any implants, you won't need them during the show. Just sit back and enjoy it.

I've got a bad feeling about this.....
Once it's over, there's really nothing to hang around for. Neither Polito, the gun on the floor, or the desk, have anything in them. Approach the bulkhead to trigger the e-mail from Shodan, then go through the bulkhead once it's done.
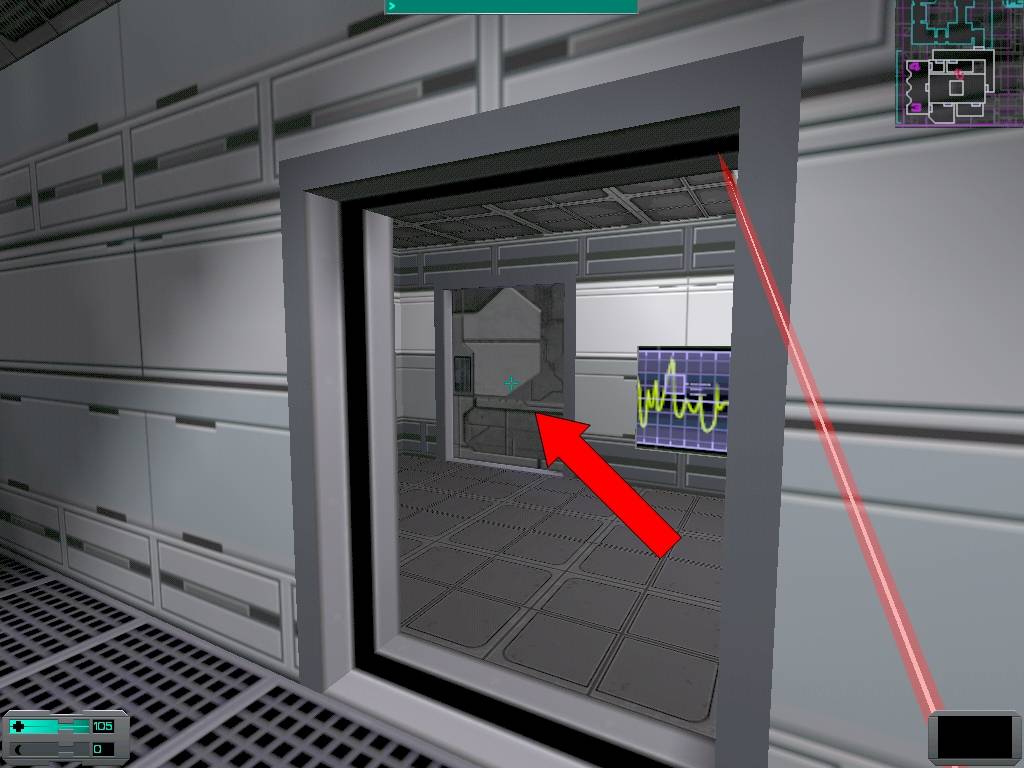
There are a few little things you can do in this central room. There are crates to your right, if you search them you'll get stuff in the form of a maintenance tool, 4 packs of cigarettes, and a log. Across the room is a resurrection station, activate it. In front of the sliding doors lies a log. Listen to it. Isn't it wonderful how bad guys always leave clues that tell you exactly how to foil their evil plans? Judging by the 2 logs you have, you know that Malick was the one taking out the Sim Units, and Malick has created overrides for his experiments with the Sim Units. You just have to keep an eye out for his 3 special friends in red. For tips on dealing with his friends in red, and their identical friends dressed in black, take a peek at Interlude 4. Also, tips on deciding which deck to do first are hiding there.
Sector B / Top
Head through the door, and you'll see the first victim. Follow him. You won't be able to keep up with him probably, but he'll corner himself quite nicely. There's a camera in the hallway he ran down, take it out. Go through the door, and you'll be in large, 2 story room, kind of a hallway I suppose. At the far end, near the room the assassin ran into, there's a new hybrid, a grenade hybrid. If you ever succeeded in dodging one of the toxin balls flying out of an egg and didn't need to use 2 toxin hypos to heal yourself afterwards, these guys are no trouble. The exploding grenades makes a loud noise that alerts everyone nearby, that's really all you have to worry about. Take him out, maybe try dodging a grenade or two if you wish. There's another grenade hybrid on the second floor, and the assassin in a room nearby, but neither are going to cause you trouble, so don't worry about it.
When it's time for the assassin, there's two options for how to deal with him. The first is the normal way of doing things, simply running into the room, charging him, beating him down, and taking his chip. The second way I uncovered during a game where I refused to kill anything myself. If you go to the second floor of the area you're in, the grenade hybrid will behind hurling grenades at you. Smash the largest window, the one overlooking the conference table, yourself, (the splash damage from the grenade hitting the window might injure you otherwise) and carefully position yourself so the grenade hybrid will hurl grenades at you, miss, and the grenade will land in the back of the conference room, which is where the assassin is. Odds are you can just turn around and keep an eye on the assassin to make sure he's where he needs to be, the hybrid couldn't hit you if his life depended on it. Once the assassin is dead, add the grenade hybrid to the casualty list.
Now, you can explore the rooms at your leisure. I'll list what's in each of them, go back to the doorway you entered from, start with the door to the left. Let's just call it door #1. In the room, there's a log, and a rad hypo, and two eggs who'll drop worms on your head if you get too close. My advice - don't go near the children. Behind door #2, there's a med hypo in a desk, and 15 nanites in the other. Behind door #3 is the conference room, and likely the corpse of a certain cyborg assassin. Behind door #4 are 18 bullets in a desk. (12 in the gun, 6 on their own.) Behind door #5 there's 6 anti-personnel bullets in a desk.
There's a grav shaft leading up to the second floor, take out the grenade hybrid, (assuming you haven't already) then return to the shaft, and go to the first door to your left. And behind door #1 is... nothing. Behind door #2, *there's a beaker in a desk,* and 15 nanites and 2 cyber modules down a little ladder. It's a trap, you'll get hurt if you go down there. But, hell, why not go for it? Behind door #3, there's 20 nanites in a desk. Behind door #4, there's... nothing. Behind door #5, there's nothing again. So, we might as well go back down. *Go back the way you came, and at the intersection turn right and go through the big sliding doors, picking the log up off the floor along the way, and 6 rifled slugs off the corpse on the other side of the door.*
You shouldn't be far at all from the grav shafts. When you go up, beware the monkey. Notice how he's red instead of blue? He fires a pyrokinesis blast.
Oh, goody. Just what I needed, a hotshot monkey.
Kill everyone up there, and swipe 3 cyber modules on a corpse by the stats upgrade unit. If you're planning on using the crystal shard, and don't have it or the skills for it just yet, you might as well upgrade your exotic weapon skills to 1 now, that's all you need. *There's 2 pool cues up here, they're recyclable, but they take up 3 inventory slots, so you should probably store them somewhere for later, unless you went to Rec first and have the recycler handy.*
When you go back down the grav shafts, there's two big sliding doors which lead to an unmarked area on your automap. Go straight ahead, ready to swing, a grenade hybrid will come out of the doors in front of your face. Once he's dead, continue down the hall to some grav shafts. Take them down, and begin looting the rooms to the left of the shaft. Behind door #1, a corpse with a log by Malick beside it. Malick's death log by the sound of things. If you wish, hit him, he's the reason you're having to fix all the sim units in the first place.

As gross as it is, there's a smidge of satisfaction in the squishy sound of the wrench hitting the dead Malick.
*There's also 6 anti-personnel shotgun shells in the locker.* Behind door #2, an egg, 12 standard bullets, a log, and standard combat armor. If you still have light armor as backup, throw it away and take the standard armor instead. Behind door #3 are some very fond memories. I'll share for the hell of it.
I'd wimped out and got the no-spider patch, and forgotten that the two doors that don't open right away released a spider when they did open. When I got my new computer I forgot to install the no-spider patch, and decided to not bother. When the doors opened, I didn't worry at all. Then, I noticed my sound card popping. I didn't worry at first, then I remembered—this sound card was new, and didn't pop, and the sound was coming from behind me. Then I turned around and saw a spider flying at my face...
Long story short, there's a big fat juicy spider who can jump, and comes through the door once you pass the doorway into the room with the piano. Enchantermon shared a handy little strategy for killing him, I'll let him tell you in his own words how he did it:
On my screenie run, I backed into the room, and when the doors opened, slipped silently around the corner. Much to my surprise, the spider came out into the hallway, and, after a few seconds, patrolled up to the doorway, turned on its heels, and walked back to its room. Seizing the opportunity, I jumped him. Just thought it would be worth mentioning, as those buggers can really hurt you.

Turn around and back into room(A). When marked door(B) opens, run to ambush corner(C) to ambush big, fat, juicy spider(D, not shown).
There's an auto-repair unit on the floor, and 30 nanites and 3 cyber modules in the locker. *When you leave, hop into the water, and look back at the door. Above and to the right of it, on a ledge, you should see 30 nanites. They're within reach, surprisingly enough. Thanks to Enchantermon, Waffnuffly, and D'Arcy for their joint efforts in resolving the mystery of the easiest way to get to those damned nanites!*
Behind door #4, there's 20 nanites and a toxin hypo in a locker. Behind door #5, there's a pipe hybrid by the bed. As he said when I walked around the corner and ran into him, watch out!

WARNING Hybrid alert in the bedroom! Approach with caution! Terminate with extreme prejudice!
In the gun near the female corpse you'll find 2 bullets, in the locker there's 1 med hypo, and in the bedroom, a plant. And that's all there is down here, head back up.
Go towards the body, and the sound of the worms. Search the body to snatch 12 anti-personnel bullets, and you'll meet those worms. You'll likely hear, or even see, a shotgun hybrid down the hallway, and hear a camera to your right. If you need to go down the hallway towards the hybrid, take down the camera first. Once they're no longer a concern, look to the lower story. There are lots of worms down there, but nothing that can't be dealt with.
When I got down here, a protocol droid showed up above, waiting for me to return, and later so did a grenade hybrid. Wave to him, as it's likely he's waving to you. I noticed the grenade hybrid shaking his fist at me, a hold over from Thief which I thought was pretty funny. Not as funny as seeing a rumbler doing the frustration dance, though. (If you don't know what it is, you'll have a perfect opportunity to find out on the Rickenbacker, in Pod 1.)
Anyways, while you're down here, search and destroy all the eggs. Go back to the grav shaft leading down, and start searching the rooms, naturally starting with the door on your left. Behind door #1 are several eggs and worms, and a maintenance tool in a locker. Behind door #2 there's 6 armor piercing bullets by the toilet (hey, you should always be prepared, right?), and 3 cyber modules in the locker by the nearest bed. Behind door #3 there's lots of fun. There 2 eggs which release swarms, 1 toxin egg, and a cyborg midwife. Kill the lady, destroy the eggs and run out. When the swarms die off, you'll find a speed booster, and 20 nanites in the near locker, then 6 rifled slugs, 3 cyber modules in the far locker, *and a plant by the door.*
Behind door #4, there are worms that fall out of the ceiling, and an egg. In the way of goodies, there's a psi hypo *and a beaker* in the nearby locker, 20 nanites in the security crate, *and a plant by the door.* Behind door #5, there's a shotgun hybrid who runs out of the far room. In the rooms themselves, there's a psi hypo and 10 nanites in one locker, and a SwiftBoost implant in another. And, finally, behind door #6, you'll find a pyro monkey by the locker with 12 armor piercing bullets and a med kit in it. The monkey makes no noise for me, it's not fun searching the crate and getting a pyrokinesis blast up your ass, then hearing the monkey scream as the blast kills him, but not me.
Head up, and deal with any friends who showed up, then head on down the way you haven't gone yet. In case you don't know which way that is, check your map, and head towards the chemical store room.

Attention all shoppers! Follow the red line to free chemicals for all your pharmecutical needs!
If you've been trying to research anything, but don't have the chemicals for it, see if what you need is in here. By the way, you know that one psi-booster that you need the chemicals Na and Ir to research? Once it's researched you can recycle it, but you need to know what it is first. Seems like it's worth the trouble for me, get the chemicals here. In the crate just before the bulkhead, you'll find an EndurBoost implant, and 25 nanites. Speaking of the bulkhead, as you've completely cleared this area, it's time to head through it.
Sector C / Top
When you arrive, you'll hear a camera to your left. Run and take it out. There's a protocol droid down the way, now is a nice time to practice your explosion dodging skills, or try to learn them. In the long hallway with the two eggs above it, there's 20 nanites. What you'll discover when you go up there is that there's two hidden eggs up there. You'll probably trigger 3 of them getting to the nanites, and each drops 2 worms. If you want to try for it, you can jump onto the railing beside the eggs, then swing and lean forward. You can take them out fairly easily that way. It's just the hidden ones then that'll cause you trouble. Especially if they land on your head and you run in circles trying to figure out where the worm is...
So.....what exactly is keeping these worms off of the floor, anyway?
Anyways, once you're done with that, there's, yet again, lots of rooms to go through. Head left out of the bulkhead, and the first door you get to is door #1. Behind it is... nothing. Behind door #2 is one of the Sim units. You only have 1 sim unit card at the moment, but it's for this unit, luckily. Click and drag the card on it, and clear up an inventory slot and receive 15 cyber modules. Behind door #3, in the locked crate, is a LabAssistant implant, and 15 nanites. Behind door #4 is a log by Malick, in the desk. Behind door #5 is *a psi hypo on a corpse,* and the crystal shard. So, do you want to use it? If so, you need to research it. Might as well get it going now. (I really haven't been very smart this time through. I didn't heed my own advice and forgot the chemical I need to research it on Deck 2. Not only that, you need a research skill of level 4 to research it, and I'm still at 1. Well, it seems I shall continue wrench only for a while.) Behind door #6 is nothing, yet again.
As you're done here, head left towards the sound of the worms. When you walk around the corner past the corpse they'll see you and come to say hello. There's a corpse hanging off the ceiling, approach him and some more worms will show up to say hello/commit suicide. There's a psi hypo on the ground below our ceiling friend, and he's got 3 cyber modules and 3 grenades still in his pockets. Keep the wall on your left, and you'll see you're at the mess hall. There's a corpse on the ground by the replicator, (where isn't there one?) swipe his 6 anti-personnel bullets, and get 2 bullets out of his pistol. Now, I normally avoid this part, but since I'm doing this for you guys, I'll put up with the mess hall. If you don't want to get torn to shreds just to say you've gone through the entire level, skip to the next part.
Well, what kind of co-author would I be if I didn't brave the Mess Hall to get some screenies? Onward!
Mess hall / Top
Take the left door in, that way you won't risk the turrets locking onto you. If you want to search to where the turrets are, it couldn't hurt to take out the security. Leaving the security enabled may in fact prove a bit painful for good old Goggles. Down the ramp to your left, and you'll trigger a ghost scene of the massacre that happened there, which will trigger a maintenance robot being spawned. Stay near the top of the ramp, when he shows up kill him swiftly. Then go to the security station on the other side of the column in the room, take down the security, *grabbing the log next to the table next to the window first,* and haul ass to the other side of the mess hall, where the camera and the turrets are. If you mantle onto the table under the camera, you can destroy it. The two turrets can be destroyed normally. There's a female corpse by one of the turrets, she has 25 nanites on her. Go down the ramp back to the area where the camera is, there's a corpse with a maintenance tool on him.
Now, it's time to go to the bathroom. Down the men's side, there's a really, really odd shotgun hybrid. Not only does he not make a single sound, but he doesn't move, although it could just be a bug in my version of the game. There's an egg nearby which isn't so harmless, it releases worms.

That's odd. The female annelids are in the men's bathroom.....
*Once you've dealt with the egg, swipe 25 nanites out of one of the stalls,* then go into the girl's bathroom, and you'll find an egg that releases annelid swarms.
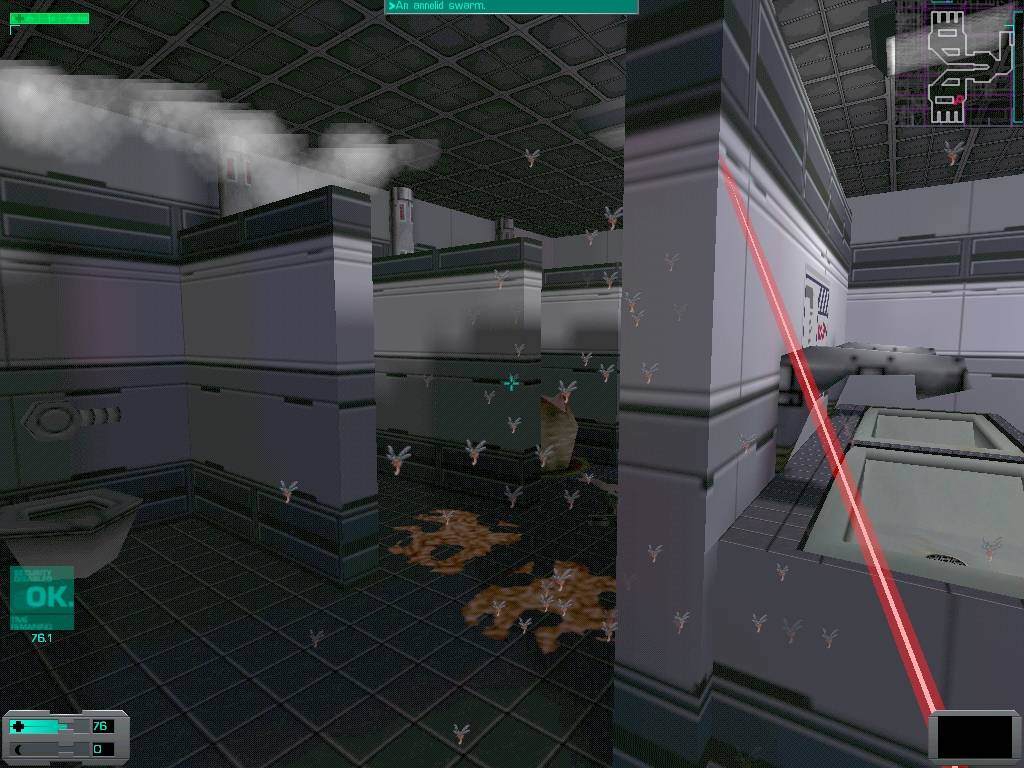
...and the male annelids are in the women's bathroom. O_o
Destroy it and run. When the swarms die off, destroy the toilets, and you'll notice there's version 2 hacking software in one of them. Odd. Check the corpse, she has 6 armor-piercing bullets and 20 nanites which she obviously won't need anymore. *You'll also get 3 bullets from the pistol by her hand.*
There, Enchantermon, are the grammar police happy now? ;-)
Return to the area with the huge massacre ghost scene. There's a door leading in back to the kitchen.
(*pokes head in door* HEY! I NEED TWO BIG MAC'S, A TRAIN WRECK SPECIAL, AND THREE SKINNY-BOY DECAF MOCHA LATTES OUT HERE, ON THE DOUBLE!
Hang a right once you go through the door and you should be there. Beware the monkey, I wasn't able to hear him either, although, again, it could just be a bug in my version of the game. Another situation where I was oblivious to the monkey until I got a pyrokinesis blast up the ass. In the room by the monkey, there's an overturned table with 10 nanites and 3 cyber modules in it, and lots of chips. Head out, and go to the cold storage area. On the corpse by an annelid swarm egg you'll find a med hypo, and in the gun near her, there's 1 shotgun shell. There's an awkward to reach corpse in one of the storage thingies, just past a 'pile of disgusting worms', who has 15 nanites on him. *There's also 12 armor piercing bullets by an egg which releases worms, and 2 worms on a shelf.* And, that's about all I could find. Head back out via the doors you came in by, the ones by the replicator.
Sector C Continued / Top
You likely heard hybrids nearby, when you leave the mess hall hang a left, and head towards their sound. You'll see a radiated hallway, and a ramp leading up and around the radiation. Go up the ramp, and kill the 2 hybrids you find. When you go down on the other side, you'll find *a log,* and a female corpse, snatch her 6 rifled slugs and 20 nanites. There's a shotgun just past her with 1 slug left in it, might as well take it too. When you were up the ramp you probably heard eggs, they're in the door under the ramp you came up. It's before the radiation, so you should backtrack to get there. Considering there's some goodies in the form of 3 cyber modules, an ice-pick, and 6 rifled slugs, in addition to the eggs, you might as well head back. And I swear, this wasn't the first time I saw that room. Honestly.
I recently played SS2 through on Impossible, and I noticed that there was no ice pick in this room on that difficulty setting.
In the corpse by the radiation leak, there's a rad hypo, and 3 grenades. There's a recharge station and a security crate near here, in the crate there's 6 armor piercing bullets and 20 nanites. Head down the hall, and you'll meet a shotgun hybrid, and another red cyborg, who'll promptly take off and leave the shotgun hybrid and you alone. Search the corpse by the resurrection station, he has 3 grenades and 6 standard bullets, and activate the station.
If you keep the wall on your right, you'll come to a door, and 3 crates. There's 6 anti-personnel shotgun shells *and 12 standard bullets* in one of them. Go into the room, and search the corpse to get his toxin hypo and 10 nanites. Go up the grav shaft, and kill the numerous worms that appear out of the corpse. Once the room's secured, you'll find 2 drinks on a shelf, a med hypo and maintenance tool on the corpse, and 2 pool cues on the pool table.
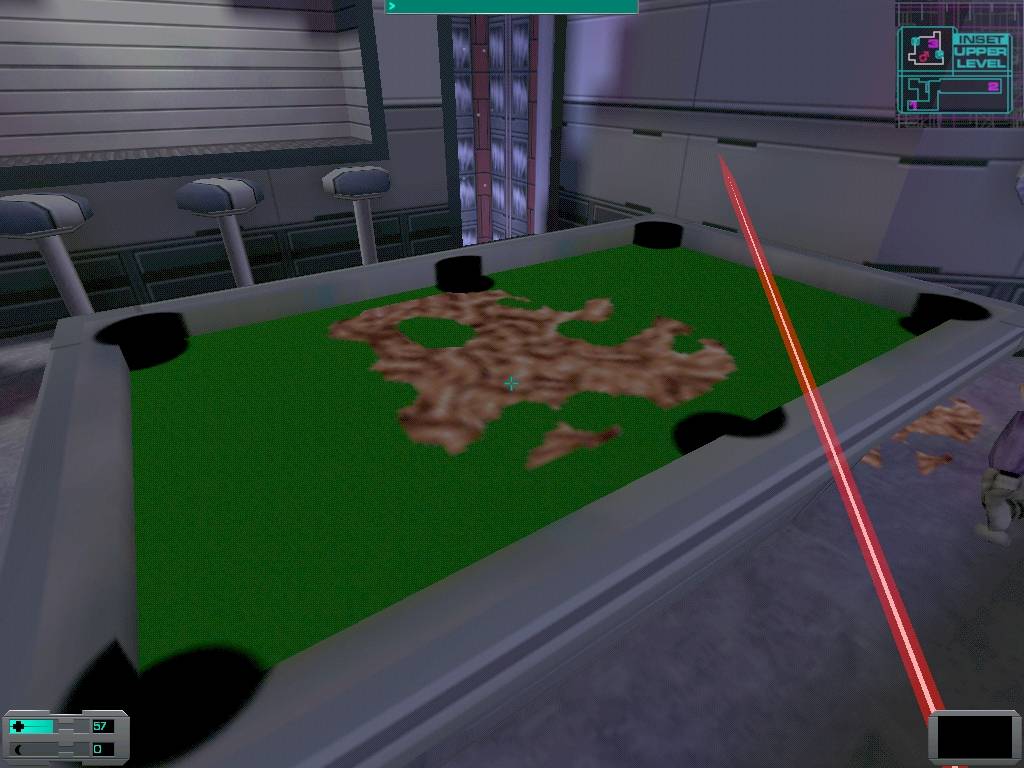
Too bad this is a melee-only run, if it wasn't, we could shoot some pool! *rimshot*
When you go back down, check between the two benches, there's another maintenance tool back there. There's also 2 cyber modules on one of the benches. You can upgrade yourself here, if you want.
Now's time to deal with the cyborg. Head out the door, and go to the hallway he ran to, the one with the steam coming out of it. Destroy the camera to your right, and go into the room. Provoke the cyborg to move around the room, and let time take care of business. Exploding barrels fall from the roof, and even if they kill you, they'll likely also kill him too. Once he's dead, wait for the explosions to stop, then it's safe to explore.
In the far corner, out of sight of the door, where you probably found the cyborg cowering originally, there's a med kit beside an EMP rifle, *and a WormMind implant.* In the corpse across from it, you'll find 20 nanites. If you search the crates, you'll find nothing *aside from a small beaker in the crate on the far left.* Just make sure you took the cyborg's card, then head left to the exit. There's a log with the code to a weapons lockup by a steaming turret, which is destroyed, don't worry. It holds a portable battery, actually. On the corpse you'll find 2 cyber modules and 6 anti-personnel shotgun shells, and in the shotgun nearby, 1 shotgun shell.
As you're done here, go through the bulkhead. It's actually bulkhead 42, which leads to the main room with the elevator. As we cleared out this sector already, there's a good chance a friend or two may have spawned here. I got a shotgun hybrid, a simple overhead swing dealt with him. As there's only one bulkhead left to deal with, go through it. Time for the toughest part of Deck 4, bulkhead 43... (if you run to Med/Sci Deck to heal up before going there, we have something in common.)
Bulkhead 43 / Top
Semi important note: when I was writing the walkthrough, I messed up big time. I meant to do things in the layout that it'll be in here, but due to a significant screw-up involving the first turret you find, a grenade hybrid, and a homicidal monkey, I got side tracked and completely forgot about how I originally planned to do things. I meant to have dealing with Sim unit 3 pretty much the first thing you do on this deck, but when I took notes I did it last. I tried to fix it up, but if it's still a bit confusing, that's why. Okay, here it goes!
When you arrive in here, you go down a short hallway, then can go right down towards a turret, or straight ahead. Go straight ahead, there's a few hybrids around here you need to deal with. Kill the first one, a grenade hybrid, then search the area here to find a ladder, which leads to catwalks above the room.
Here's the ladder, in case you're having trouble locating it.
Searching the catwalks will yield 3 cyber modules when you find the corpse under the egg with the annelid swarm. When you go back down to the lower level, track down the auto-repair unit by a corpse, if you haven't already found it.
Another visual aid for those who couldn't find it.
Keep sharp, because another grenade hybrid will make an appearance soon.
(Originally written after the other Sim unit was taken down, and everything else was done, the most nitpicking opportunities will be here, hopefully)
Once you're done, go through the nearby door, which leads into a spot in the mini-map that isn't filled in.

That would be this door.
If you see a log on the other side of the door, by Malick, you're heading the right way. Go left, and run down the hall and take out the camera. If you go right, you'll be playing a game of chicken with a turret, which is aiming right in your direction when it comes out of standby. In other words, it's not such a good idea. When you go into the rooms here, you'll have the perfect opportunity to ambush it. Check your mini-map. There's a room that has a door right beside the turret, if you go out there, and slowly circle the turret so it can't get a steady shot at you, you can destroy it.
This is the door you want to use for your ambush.
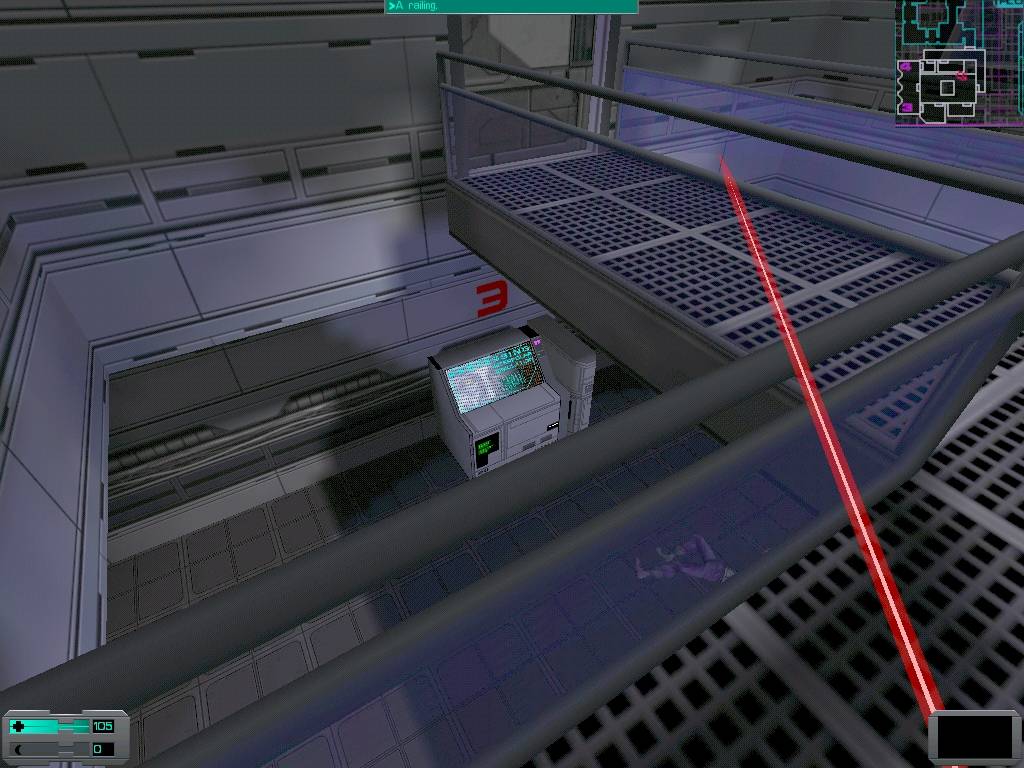
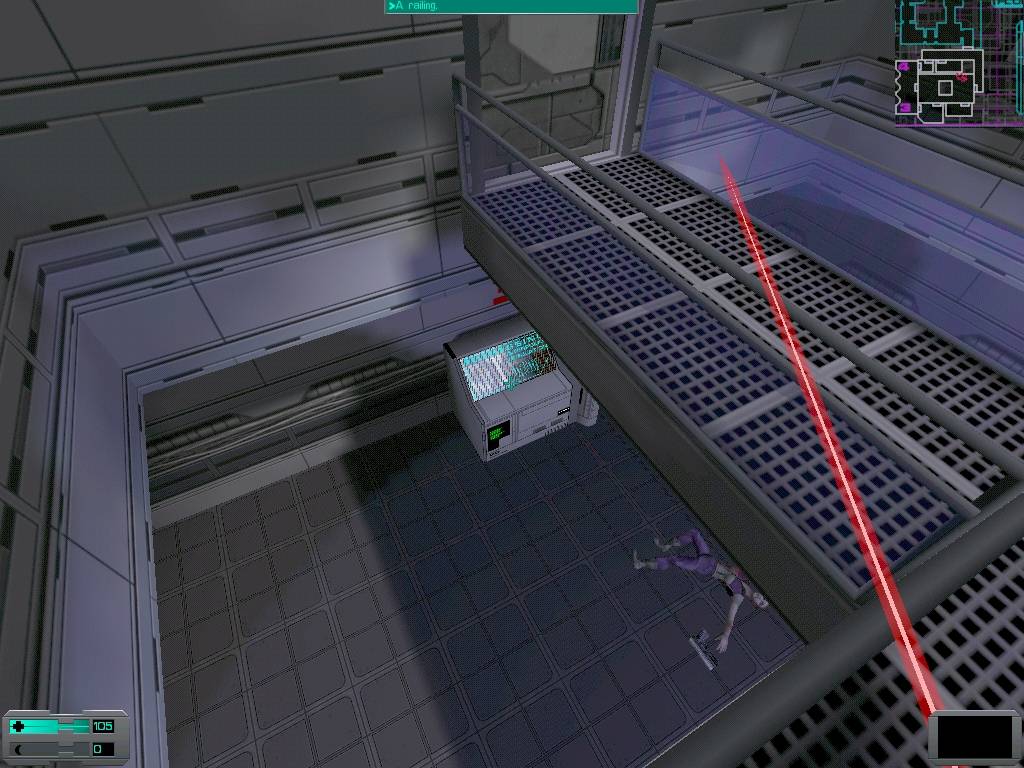
Once you're ready, return to the catwalks in the middle of all of the room in this area. There's *15 nanites and an ExpertTech implant in the desk in the first room on the right, and in the first room on the left, there's a small beaker.* Check your mini-map, you're about to deal with Sim Unit 3, which is booby trapped, like the log said. There's a room with the numbers 3 and 4 in it, and two ladders leading down. Whatever you do, don't go down there! You'll be using them to escape. Go to the catwalks as far away from there as you can, and look down. See Sim Unit 3?
Okay, so.....what? Do you expect me to jump down there?
Now, get the card into an easy to reach slot. Try to jump onto the railing that runs towards and over the Sim unit, then drop onto it, and reprogram it. It's the easiest railing to leap onto, so you shouldn't have any trouble.
Me and my big mouth.....
If you do, just vault over the railing and crash to the ground. You may take more damage, but that's life. Once the unit's reprogrammed, make a beeline for the ladders to avoid the spiders. *Or, if you're feeling lucky, well, I'll let Enchantermon take the stage... *
There's six standard bullets and a laser rapier on the female corpse in front of the sim unit, and three standard bullets in the gun by her hand. Believe it or not, I managed to get a hold of these goodies without any damage from the spiders. First, before going down, clear out three inventory slots, six if you're also going for the rapier, seven if you don't have a slot for standard bullets. Drop onto the sim unit, reprogram it, then get the spiders to follow you on a merry chase around the pillar in front of the corpse. When you get far enough ahead of the spiders, grab the bullets off of the corpse, then on the next pass, grab the laser rapier, and on the final pass, grab the gun and run for the ladders. You can unload the gun and toss it once you're safe.
Once you're running for the ladders, you'll see there's eggs by them. If you go up, you should be safe from the swarms. Now, head back to the hallway with the turret in it, which you haven't gone down yet.
(What I wrote before I did the sim unit section mentioned above)
When I approached the hallway with the turret down it again, both a grenade hybrid and monkey were on their way looking for me, the hybrid I'd killed had a chance to throw a grenade and alert them. As they were going to sneak up on me and tear me apart if I avoided them, I finally broke down and killed them both. Since I had to get into the hallway to do this, the turret was alerted. I waited until the turret went into stand-by mode, you can hear it when it happens, then I charged it and destroyed it.
When you've finished it off, listen a moment. Do you hear an odd squishy noise to the hallway down to the right, the same direction as the camera you hear? Destroy the camera and you'll meet the creator of that noise... a spider. Yippee! Kill it, then activate the resurrection station. Hope you have lots of nanites, you may very well be massacred shortly.
If go out of the station, and look to your left, you'll notice a keypad. Well, you received a code earlier on the deck for an armory. Shall we try it? 13433, for the lazy.
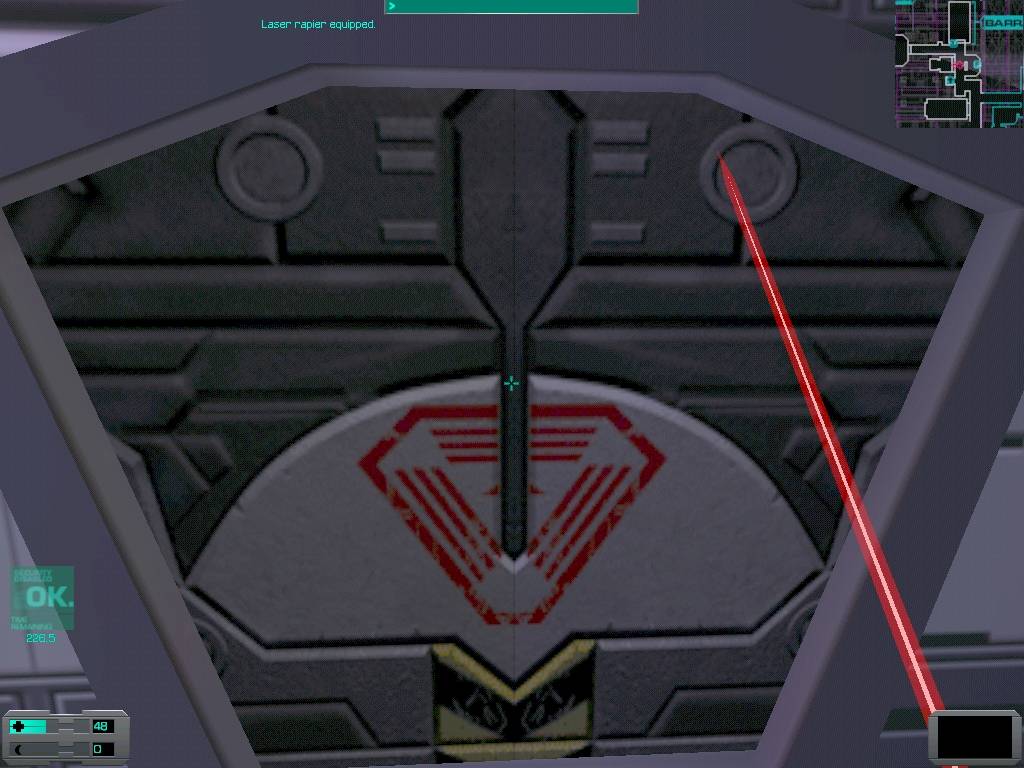
If you have the laser rapier, now would be a very good time to equip it.
On the other side is a brand new robot to play with! Take him out, and get 12 bullets from the assault rifle, and 6 grenades from the back room. Or, just not bother with him. Your decision.
Leave the room, head straight ahead, and get 6 anti-personnel shells off the floor in front of the replicator. If you haven't gone to Rec deck yet, you may wanna hack this replicator, with either an ice-pick or your ub3r l33t hacking skills, because you get a recycler from it. If you went to Rec already, don't bother, either you already have a recycler, or you're about a hop and a skip away from the replicator which only needs a repair tool before it'll give you a recycler.
Once you've got it, go to your right. There's a turret in this hallway, by a recharge station, there's a conveniently place security station near a door here. If you're hacking, you can just slip into the room here, and hack the nearby security machine to be in relative safety while you pound the turret to death.
If you're not hacking, try out this trick Marecki told me. If you crouch and squeeze yourself as far as you can between the turret and the recharge station, for some reason it won't be able to hit you. The explosion will probably kill you, but that's life.
Speaking of the room by the security station, if you raid it, you can find some supplies. A log, 75 nanites, a silent egg, 3 cyber modules, a ton of worms, and a spawned grenade hybrid. Remember this room, we'll be running here later.
Since we're going to be stepping straight into hell soon, let's backtrack a bit. Go back to the turret by the ramp, and keep going the way you haven't gone just yet, you should see a log on the floor by a door. There's more bunks here. In the lockers, you'll find a BrawnBoost implant, 45 nanites, and a speed booster. Be forewarned, when you reach the back of the room, 2 shotgun hybrids will appear, but they're nothing an overhand swing with your wrench won't deal with. Once you're done with that, leave the room.
Hang a right and run down the hallway, there's a turret you want to take out. When it's gone, go into the large, empty room with the 12 anti-personnel bullets in the center, snatch them, then go to the upgrade units. There's a corpse in the middle with 3 cyber modules, might as well take them, he obviously can't use them. If you want to, get some upgrades. If you want, say, more hitpoints to deal with the next part, help yourself.
Once you're done with, head back to the hallway with the destroyed turret by the recharge station. Head down the hallway, when the door opens, run to the turret to the left. There were originally 2, but someone who's probably dead by now destroyed the other. Bang on the turret, try to destroy it before the shotgun hybrid, robot, and spider nearby come in the room.
When you're resurrected, go back to the room by the security station and the remains of the turret near there. Look down the hallway towards where your foes will be approaching from, and be ready to duck back into the room when they do. Marecki told me that it's much easier to destroy the robot when you're hiding behind the pillars in this room, if you're lucky they'll block the explosion that follows the robot's death. Don't bother using med hypos during this particular fight, unless you start running out of nanites, or you can't get a single hit in without getting killed, or the baddies are standing right in front of the resurrection station.
Once the spider, hybrid, and robot are killed, you're almost done here. Go back to the two-turret room and search them both for supplies, and get the 6 armor piercing bullets off the corpse.
Head straight down the hall, and you'll find the final red cyborg. Be ready to swing as soon as you can, he'll take off running down a hallway with a camera in it, and odds are you won't catch him before he's in it. Marecki pointed out that it's easier to just let him go once he reaches that hall. Once the door the assassin runs through closes, (assuming it doesn't just stay open) run down the hallway and destroy the camera. Then, go through the door, and give the assassin the same fate as the camera.
Once you kill him, conveniently enough you're right next to the sim unit he has the card for. This room is the one you may or may not need the security card from Engineering to get into. It's an absolute mess in here, but there's goodies to be found.

Allow me to be the first to say: Where are the guts that are supposed to be hanging out of Bronson?
You'll find: 6 anti-personnel shotgun shells, 12 standard bullets, 1 maintenance tool, 1 Diego log, 1 Bronson log, 1 psi hypo, and 40 nanites. Marecki reminded me that you need to watch out while you're searching this area. As he said:
Once you've reprogrammed the sim unit two shotgun hybrids and a spider are bound to show up in the area, one by one. Taking them out is easy, but only if they don't catch you with your back to the door and sifting through Bronson's intestines in search of useful equipment.
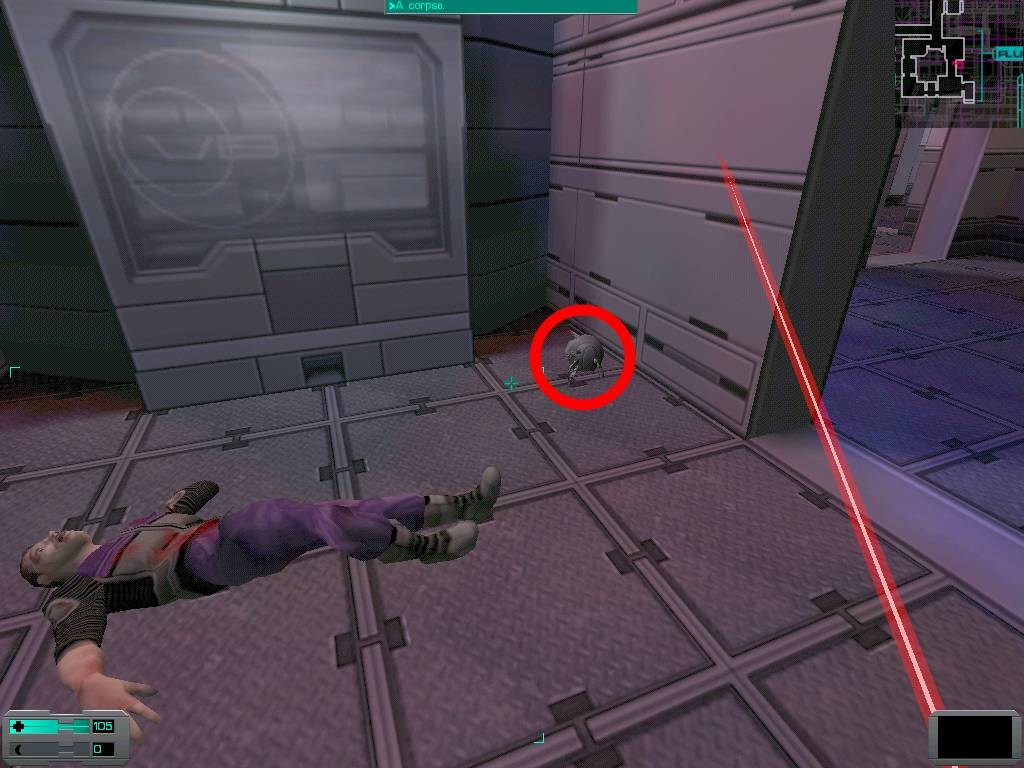
When you leave through the hall, before you get to the junction room again, you'll notice a room to your right with an elevator in it. Take it down, and you'll find some corpses in cells. There's one cell you can walk into, after a ton of worms spawn, search the body and find some kind of implant. Turn to leave, and you'll notice the cell bars that you can see on the other cells have shown up.
I didn't do it! Honestly! I was framed! I WAS FRAMED!
Look up, and you'll see some stuff to break. Break everything within reach, and you should be able to leave.
When you reach the junction hallway again, head straight across. There's a log by Delacroix on the floor, and just to the left of the huge mess around the corner, you'll find a med kit, *and 2 cyber modules in the hole in the floor.* When you're back in the junction room, go right, and you'll alert a camera. Destroy it, and remember this area. You'll be coming back here later.
When you go to leave here, you'll notice a ramp leading down. Oh, hell, why don't we go check this out? I mean, the worst that could happen is we get killed, and sent back to the resurrection station, which is closer to where we want to go anyhow. There's 4 doors down here, naturally, we're starting with the one to our left. Behind this door is an incomplete surgery unit. Behind door #2, we have lots of worm piles, 6 rifled slugs, and a maintenance tool. Behind door #3, we have a corpse with 2 cyber modules, and to the right of his head, on the floor behind a chair, we have a log, which is the code to the armory on Deck 2. Handy this late in the game? If you want a few nanites, I suppose so. Behind door #4, we have a monkey, and who shot me in the face with a pyro blast, killing both of us. If you come back, you'll find a psi booster behind his corpse.
Get out of bulkhead 43. Run for it, and get out, killing anyone you come across, since you'll be coming back here. When you get to the elevator, you may have a very, very nasty surprise waiting for you. I had 2 cyborg assassins, a shotgun hybrid, and 21 hitpoints coming in here. I wasn't exactly amused to put it mildly. I managed to kill them all, and ran into the elevator, and headed to my safe spot, Deck 2, as we're done on Deck 4, for a little while. Depending on how you did things, either you want to get ready for, then head to, Rec deck, or you want to get ready for, then head to, Command deck.
During my game where I noted what stats I upgraded when, I did this level after rec deck. I took my exotic weapon skills to level 6, and my agility to level 3.