
Walkthrough
Engineering
- Coolant Tubes
- On The Way to the Cargo Bays, Part 1
- On The Way to the Cargo Bays, Part 2
- Becoming Undead
- Cargo Bays In Depth, by Enchantermon
- Cargo Bays Basics, by TheNightTerror
- Backtracking
- Powering up the Von Braun
- Side Trip
Coolant Tubes / Top
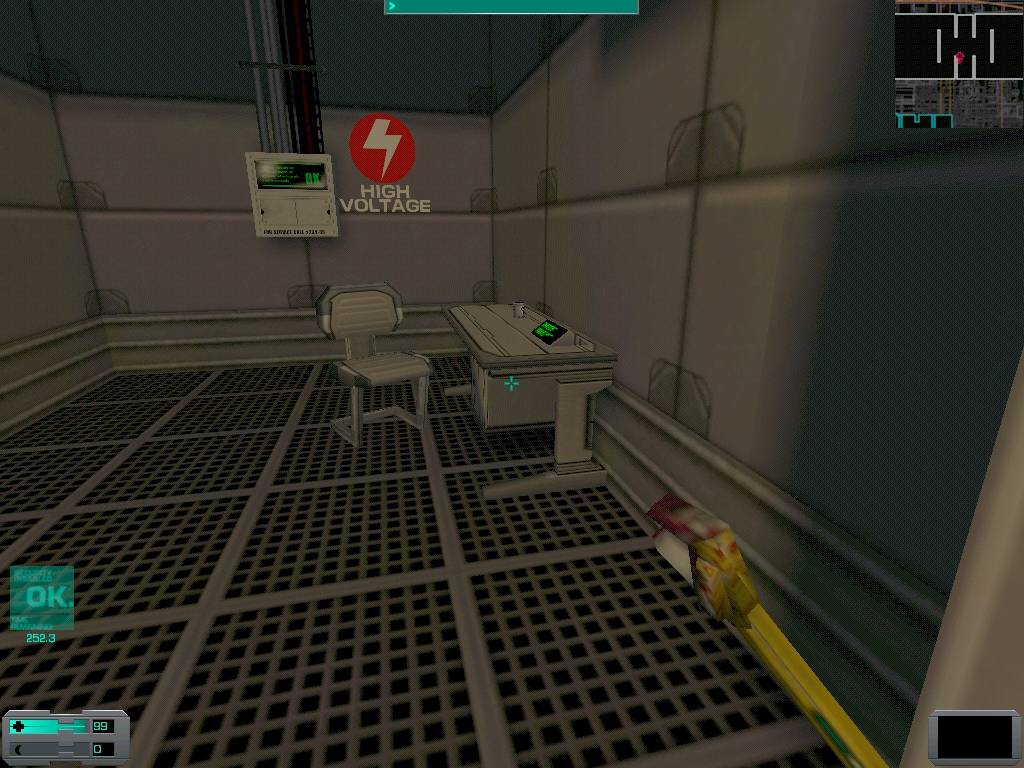
Now, it's time to get rolling on the deck that's actually somewhat tricky. When we land in the first room, there's some stuff to pick up off the ground. There's a severed arm with a bottle of vodka still in hand. Since the owner of both the arm and the vodka has long since departed, snatch the bottle, and pick up the rad hypo nearby. There's a mug on the floor by the desk in the next room, and the desk has a log, med hypo, and 20 nanites in it. If you haven't already, enable the minimap.
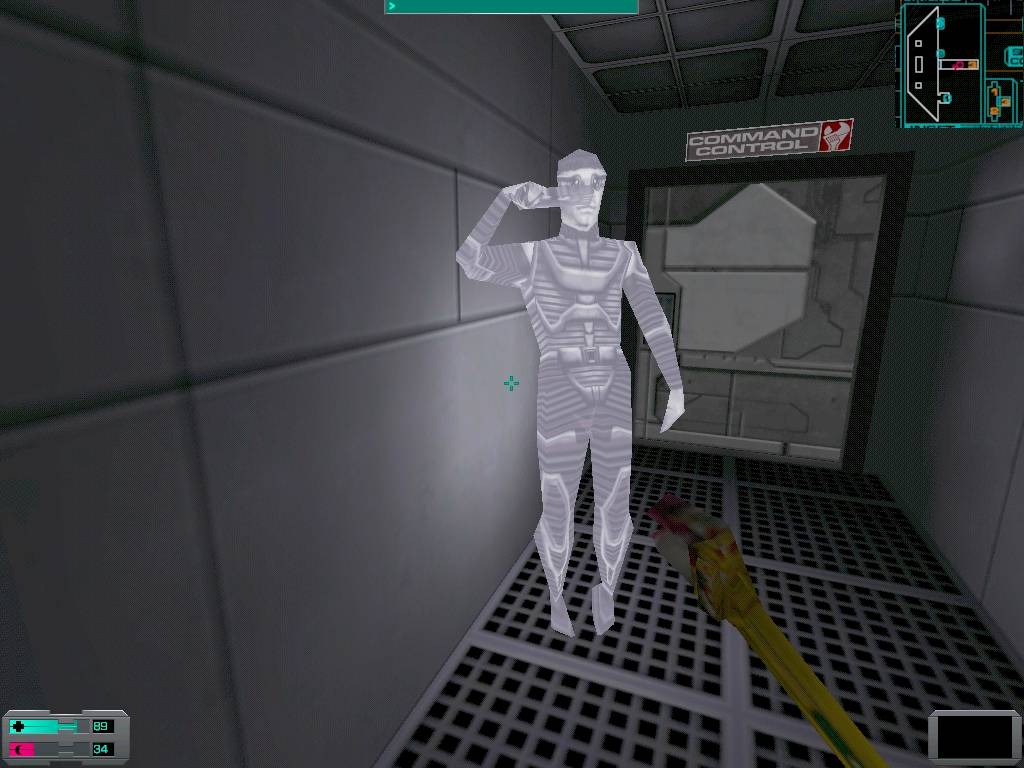
When you go through the two doors, you'll be in the radiated coolant tubes. You need to get into the engine core, the sign on the floor tells you to go left to get there. When you go through the door only door along the way, you'll be face to face with a hybrid, so be ready to kill him.
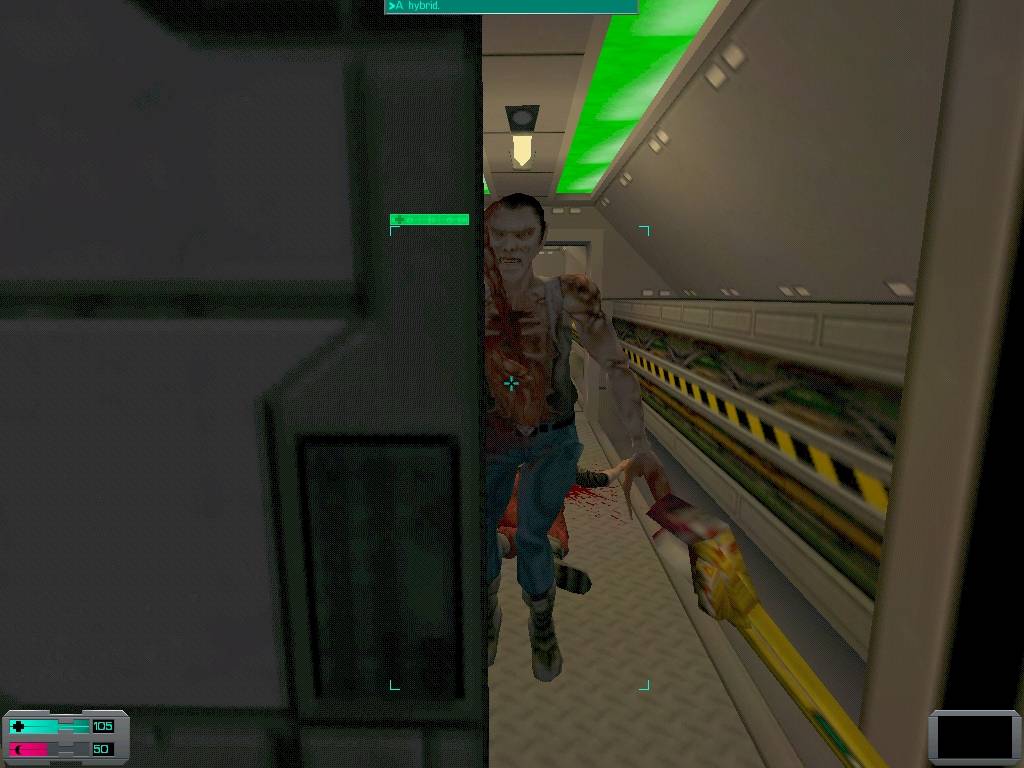
Let's play peek-a-boo with a hybrid!
The corpse behind him has 2 cyber modules, swipe them. There's a pack of cigarettes on the floor by the security crate, which has 6 armor piercing bullets and a med hypo in it. You can't go through the door there, the safety seals are locked because of the radiation. You need to purge the radiation, you need to head through the level until you find a lead.
Now, it's time to get out of the coolant tubes. If you look at the full sized map, you'll see there's one corridor that leads south, if a spaceship has a south. Head towards it, if you see a ghost of someone dying of radiation poisoning, you're going the right way. There's a room on your left which holds a corpse with 2 cyber modules on him, a pistol with 1 bullet in it, and a crate containing 6 anti-personnel shotgun shells. Keep going down the corridor until you get another e-mail from Polito, she'll give you the code to Utility Storage 4.

Save the rest of this corridor for later.
In the coolant tubes, there are two doors heading towards the shuttle bay, aside from the inaccessible one that leads to the engine core. The path near the top of the map is the one with the most radiation, if you take the lower path you won't take as much damage. I ran into 2 hybrids going through here, but I felt like I missed one, he was probably patrolling the upper path through the coolant tubes. Just before you reach the door leading out, you'll find Utility Storage 4 on your left, and a corpse with 6 standard bullets on him. Punch in the code for the door which Polito provided, 59004 for the lazy, and raid the crates. There's a toxin/radiation suit, a rad hypo, a speed booster, a med hypo, and 10 nanites. Leave the coolant tubes, and get ready for another awkward moment. Tips on how to survive this situation are in Interlude 2.
On the way to the Cargo Bays / Top
Now, you're right where you need to deal with a protocol droid. Bad is that it's the first one in the game and you probably haven't tried dodging the explosions before. Plus, it's a nice cramped area. Not to mention the damn security camera in the best area to try dodging. It's a bit awkward to destroy, you need to be under it and to jump, and by then it'll have spotted you. Stopping with a droid after you isn't the best idea. If you can't dodge the droids explosion, run into the resurrection station, and activate it on your way in. The camera will have seen you, and the droid will have too. He'll come in and blow you to bits, the camera won't be able to see you for too long, and if you don't survive you wont go anywhere.
Once it's exploded, take the camera out, and lift the log off the floor. Check the decapitated female corpse, she has 15 nanites on her. If you have a sick sense of humor, try nudging the nearby head and pushing it back towards her body and try to position it so that it's almost back in place. I did it once and now it's almost a tradition for me, it seems Enchantermon's addicted now too...

You know, it's a female body, but that looks like a male head to me...
You've probably heard a monkey inside the central room. He's on the top catwalk thingy, climb the ladder up and smack him with the wrench. There's 12 armor piercing bullets in front of the security computer. If you climb down to the lowest level, you'll find a corpse with 2 cyber modules, and 5 nanites on her.
Go through the door that had the log in front of it, and go up the metal floor. You'll run into a pipe hybrid, but showing him how superior the wrench is to the pipe will deal with him. There are two corpses in the room, the male one has a maintenance tool on him. There's a camera in the room just past the security computer, take it out.
Now's the fun part. We've got an area with a nasty amount of respawning baddies, and there's turrets along the way to boot. Since the resurrection station is active, you can get killed as many times as you need to take them out, so long as you have enough cash, that is. ;) When a security camera gets thrown in the mix things get ugly, though. Anyways, head on through the door, and take out the camera. Go through the next door, and get 6 standard bullets from the corpse, and 2 bullets out of the gun by his hand. Go up the grav lift, and get the log off the floor. Go back down, and continue the way you were going, *stopping to borrow 15 nanites from one corpse, and 6 armor piercing bullets and a psi hypo from another.* In the next room there's a turret, take it out.
The next room is very awkward to get through. There's an out of reach camera, two turrets, a card on a body half way through the room that you may need to finish the game, and the safe place to run to is fairly far away. So, if you're hacking, I'd strongly recommend you take down the security and destroy both turrets. If you're on Easy and specializing in hacking you already may be good enough to hack one of the turrets. But, I'm going to assume you can't.
To quote a Sci-Fi scientist: "Oh, boy."
You can leave everything in place, and proceed through the bulkhead, if you want. To get past the turrets, when you come through the bulkhead again, stand to the far left of the doorway so the turret that doesn't have the camera above it will be able to shoot you, so you'll die and be resurrected past the room. Just make sure you have 10 nanites, for your sanity's sake. You may like to skip my insane rampage technique.
If you have any strong liquor to soothe your nerves, drink it now. I have a technique that will let you take down both of those turrets, and the camera, on Impossible, without hacking, while half drunk. In fact, I discovered it under these conditions. However, let me tell you, it's no easy task. You will set off the camera and activate the alarm, and die several times. There's no way to avoid it, but when you're killed, you'll be a short sprint away from a security station. Even without hacking skills, just using it turns the alarm off. There will be spawned baddies to deal with on your way back there, but that's life and death, and you can die all you want with enough nanites. (Speaking of nanites, I'd recommend going hybrid farming on Med/Sci deck if you have less than 100 before trying this, just to be on the safe side.)
So let's get started! When you walk through the doors into that room, run to the turret under the camera, and try get it between you and the other turret, and swing as much as possible before it kills you. You'll die, alarm will go off, you'll turn off the alarm with the security station by the resurrection station. Repeat this until the turret under the camera has been destroyed. Always make sure your target turret is between you and the other turret when you die, that way the other turret will shoot your victim and speed up the process of destroying the turret.
Once the first turret is down, the second is relatively easy. It won't see you as you enter the room, although the camera will. Just ignore it. When you run into view of the turret, don't stop moving and keep swinging. Hopefully you'll fully destroy it before any friends show up to party. I'd recommend just surrendering after the turret is down, odds are the blast from it exploding will earn you a message '10 nanites used in reconstruction' anyway.
You're almost done. When you reenter the room, sprint across the room and get into the room with the bulkhead switch in it, out of view of the camera. Wait for it to calm down, and get ready. What you need to do is get behind the destroyed turret, out of viewing range of the camera. Once behind the turret, run and jump, and get on top of it. Once on it, look up, jump and swing at the camera. With a little luck, that camera will soon be as useless as the turrets, and you'll have the once highly dangerous room looking like an abandoned graveyard. Good work!
Once this room is safe, either by hacking or using my rampage technique, search the body in the middle of the room to get the security card. Once you have it, enter the door right beside it. There's a red squishy thing on the surgery table, research it. It'll heal you once you know what it is. There's 15 nanites on the corpse, 15 in a locker, and 2 cyber modules and a log in the other. There's also light combat armor, which you should have by now, and the two upgrade units you're not allowed to use. When you leave the room you'll meet up with 2 shotgun hybrids. Do the only humane thing there is, kill them.
More Pre-Cargo Bay Times / Top
Well, we're almost to the cargo bays now! Almost. *Swipe the BrawnBoost in the hole in the floor to your right,* then head forward, and when you reach the room with the big central column, go to the left to avoid accidentally getting yourself zapped. Everything fades to white, and in a CamVator vision, the Many tries to convince you to join them, because their biology yearns for you, and gives you a tour of their innards in an attempt to do so. Thanks, but no thanks.
Well, my biology yearns to give yours a nice thrashing.
This room you're in can save your ass if a protocol droid is after you. When the vision starts, you're in a room with a large column in it. If you approach from the bulkhead and go around the right side of it, you'll see a wire sparking, if you're too close, it'll zap you. One zap will detonate a droid, so if one's after you, lead him back here, and get him to walk right under it. It may take a few tries running around the column, but saving a trip to the resurrection station and 10 nanites is worth the trouble, in my opinion.

You have no idea how long it took for me to get a screenie of the droid exploiding in action...
Once the vision's over, head into the next room and lift a log off the floor, and get 3 packs of cigarettes out of a box, and 4 bottles of liquor out of another. Head into the next room, which has 4 doors, and a camera in it. Take the camera out.
Now, depending on what kind of shape you're in, and how the idea of going to the cargo bays with only a wrench sounds to you, you may want to get the resurrection station running. Since I'm a smart person and went through the bulkhead with 9 hitpoints left, I'm going to go fire it up and write the walkthrough for it. If you don't want to go there, then skip the next part and go straight to the Cargo Bays section.
Precautions / Top
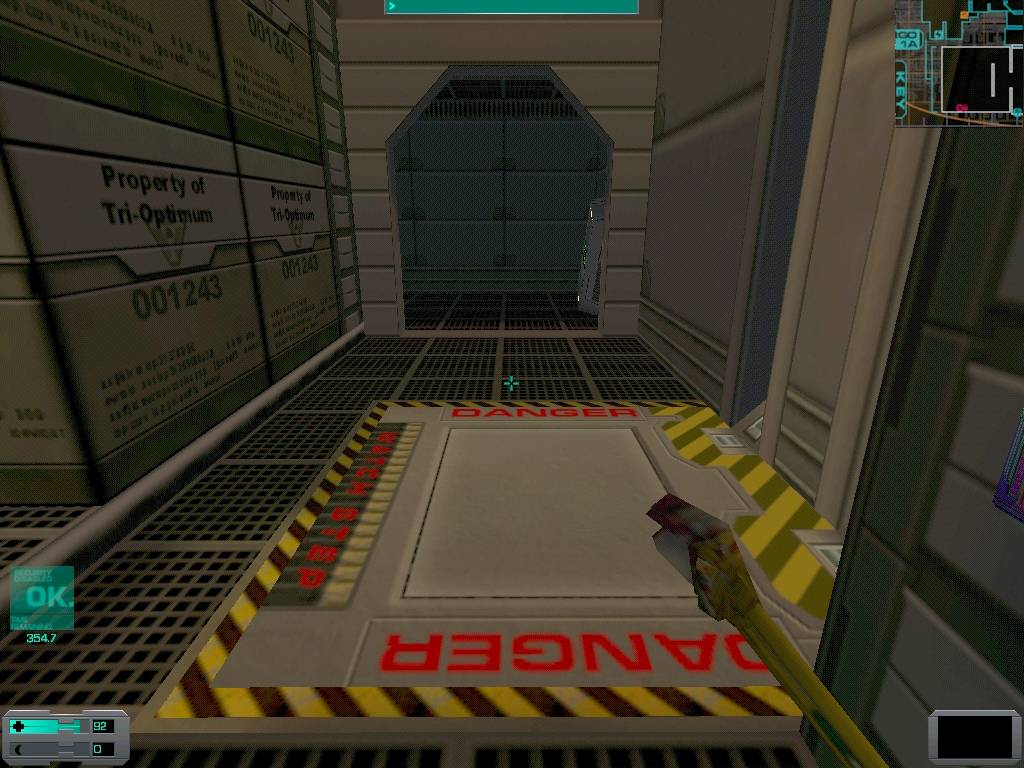
Head straight through to the room with the barrels in it.
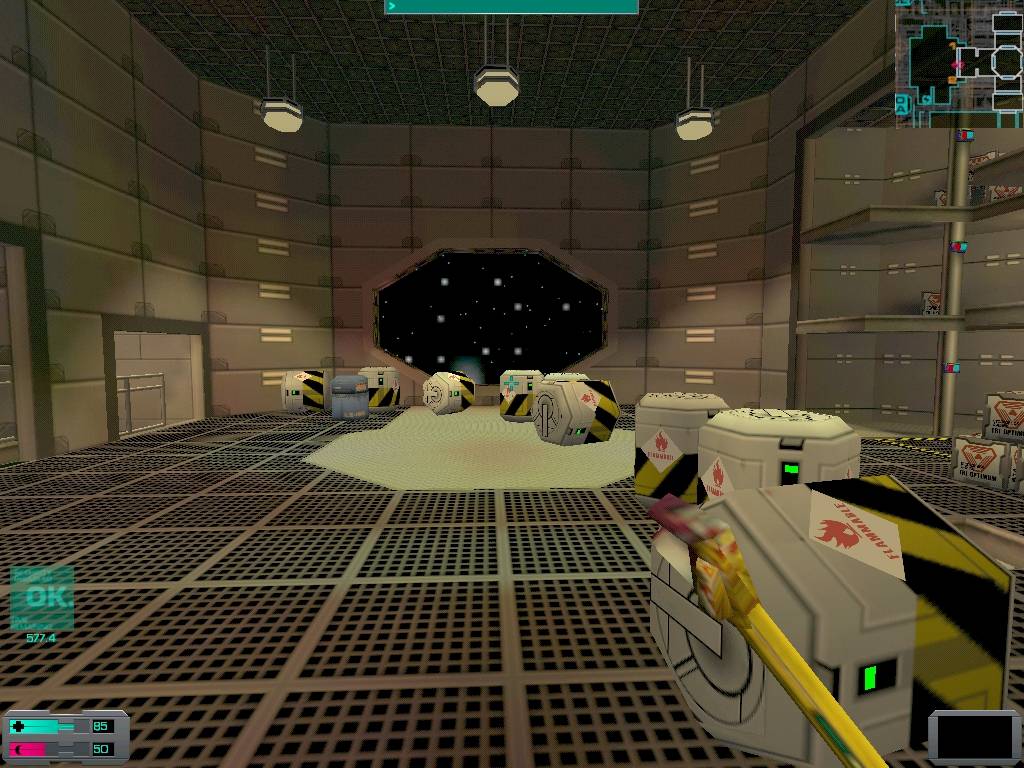
Just what are all these explosives doing in a Shuttle Bay, anyway?
You need to get into the grav shaft heading up to where the resurrection station is, which is to your left. Don't waste any time. There's a turret who'll happily shoot you, or shoot the barrels and blow them up, a monkey who can also shoot you, and a shotgun hybrid who'll love to kill you too. I'd recommend having 8 or 9 hitpoints in case the laser turret hits you. I got shot by the turret, and ended up with 1 hitpoint left and had to break down and use a med hypo. Head up the elevator, and watch the ghost kill himself. Looks like you, doesn't he?
Well, this is.....disturbing.....
Walk forward and out the door far enough for a hybrid to throw a severed head at you, then back up. There's a pipe hybrid and a shotgun hybrid up here, take them out, but stay out of sight of the camera. Once they're dead, you can knock out the camera in relative safety. Despite being on a high floor, setting off the alarm will still result in baddies coming for you. They'll just magically appear at the top of the elevator. If you don't believe me, then set the alarm off, and when you go back to watch the elevator and end up face to face with someone who appeared out of nowhere in 2 seconds, don't say I didnt warn you.
Activate the resurrection station, and relax a bit. Search the bodies, you'll nab 10 nanites. Get a log off one of the computers, then look outside if you want. There's 2 upgrade units in here, the only 2 you're allowed to use actually. If you want to increase your strength or endurance stats, this is the time to do it.
Once you're finished with the upgrade units, kill the shotgun hybrid in the main room, the monkey on the high ledge, and the hybrid down in the hole, however you see fit.
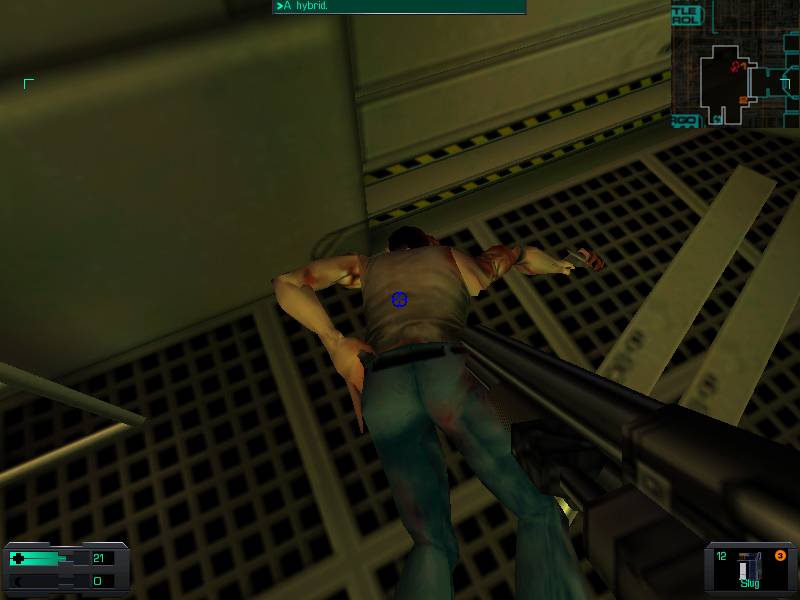
Obviously dead hybrids get itches too! (Screenshot courtesy of SHODANs Hacker.)
If you're hacking turrets then leave it be and let it do the dirty work, otherwise take it out. The turrets aren't wise, though, even if theyre not hacked, if you can get the shotgun hybrid between you and it, it'll shoot the hybrid until it drops, then shoot you. Once the hybrid is dead, head for the turret, but never approach it in a straight line, and beat it down.
Once all hostility in the room has been neutralized, get some supplies. In the crates by the ledge where the monkey was, you'll find 8 packs of cigarettes, 9 bottles of liquor, a log, a maintenance tool, 2 bags of chips, a bottle of juice, and 20 nanites. In the hole where the hybrid was, there's 6 rifled slugs and 6 anti personnel bullets. Once you're done there, hit the recharge station, and then its off to the cargo bays. Due to their size, two walkthroughs have been written for them. The basic one was done by me, the in-depth one by Enchantermon. Pick the one you want, and let's get rolling!
How to Cope with the Cargo Bays, in-depth, by Enchantermon / Top
Cargo Bay 1A
Upon entering Cargo Bay 1A, run across the room to a stack of crates, there's a med kit in one of them. Now, run into the room on the left, find the shotgun hybrid, and kill him. Then go into the room on the right, hunt down the robot, dismantle him quickly, then take a look around. You'll probably see an alley of boxes with Protocol Droid crates along them, and some stuff on a box at the end. Do not go down there, we'll get that stuff later. F or now, take one of the elevators up to the second level. There, you'll find a male corpse with 6 anti-personell shotgun shells and 5 nanites. Continuing to the third floor will gain you 15 nanites and a bag of chips on another corpse. Now, ride back down and go through the double doors here, they lead to Cargo Bay 1B.
Cargo Bay 1B
Be ready when you come in here, there's a monkey who'd like nothing more than than to shave a few hitpoints off of you. We can't have that, now can we? Protect your hitpoints, and beat down the monkey. You'll probably hear another monkey, don't worry, he's above you. In front of the door you came in, there are some oddly-stacked boxes. In fact, they look a little like steps, don't they?
What? You've never heard of the box-step?
Mantle and walk across them to find a security crate which holds 10 nanites and 6 standard bullets for the decent hacker. Leave this alcove the way you came, and snatch 6 more standard bullets from another box.
Now we can deal with that annoying monkey. Ride the elevator up and smack him with the wrench. Once he's dead, you'll hear yet another monkey. Again, he's above you, and though he may get on your nerves, he can't hurt you, so don't worry about him. In the middle of the room you'll find some more boxes to mantle, and on top of them are 6 standard bullets. Grab those, then jump down and ride the elevator up to deal with the other monkey.
There are 2 cyber modules and 10 nanites on a corpse up here, so after you nail the monkey, grab them, then head back down. From the ground level, head into the hall. On top of a large stack of boxes there are 5 nanites, swipe them. You might hear a monkey in the distance, so stay alert. In the rooms between the halls you'll find a SwiftBoost implant and a psi hypo on the corpse, but before getting them, dart around the boxes and take out the monkey who's waiting for you.

Get the monkey before he gets you.
There are two monkeys in here, slay both of them, then do some searching. The corpse in the hall has a log on her, and if you stand by her and look toward the elevator, you'll see 5 nanites on some boxes, steal them, too. Now, look at the view from on top of the boxes. You should definately have light combat armor by now, but if for some reason you don't, you now have no excuse, mantle the other stack of boxes and get it.
Take one of the elevators up, and smack the monkey up there. What's with all these monkeys, anyway? Ignore the squealing above you, and grab 6 standard bullets and 10 nanites off of a female corpse, and 2 standard bullets from the gun beside her. Now, head up and deal with the last monkey, but be careful to avoid the sparks from the junction box! The female corpse has 2 cyber modules and 6 rifled slugs on her, and since she obviously can't use them anymore, take them with you.
Now, take the elevator back down to the ground floor. Go all the way back to Cargo Bay 1A, and face the row of Protocol Droid crates. To avoid releasing the droids, be extremely careful: Walk past all of the crates until you are as close to the box with the goodies as you can be. Mantle the box, but DO NOT walk forward! Take the 6 armor-piercing bullets and 5 nanites, then jump off the box and hightail it out of the alley. If you're lucky, the droids should not be released. Now, head into the second part of Cargo Bay 1A.
Cargo Bay 1A Revisited
There's a body in front of a row of 10 Protocol Droid crates down here; Do not search her! Instead, head to the elevators, but don't take them up yet.
The second level is tricky to deal with, especially if you want to get everything and, at the same time, avoid having three Protocol Droids blowing up in your face. I'm sure you do, so be careful up here. First, go to the elevator across from a couple of boxes in the hall.
That would be this one...
Send this elevator up, but don't ride it. This is your escape elevator. Now, go to the other elevator, the one across from a leaning Protocol Droid crate in the hall.
...and that would be this one.
Save your game, then ride it up. Before proceeding, inch forward off the elevator and send it up to the third floor. Trust me. Now, look across the room. See why I told you not to go up the other elevator? That Protocol Droid will be more than happy to come out and greet you if you get close enough. What you want to do now is run over to the box with 10 nanites on it and mantle it as quickly as possible.
Let's play "Nab the Nanites!"
Grab the nanites, then take a look at the alcove in the middle of the room. In your mad dash, you triggered two more Protocol Droids and, more than likely, the one next to the elevator. Now, just wait until the droids come closer to you, or move away from the box of bullets on the opposite row of boxes.
Now let's play "Swipe the Standard Bullets!"
When it's reasonably safe, run over, mantle the box, and grab the 6 standard bullets. Now, you need to wait for a clear space so you can mantle the boxes directly across from you.
Finally, let's play "Haul Booty Before The Protocol Droids Blow Your Face Off!"
You may have a good chance right after grabbing the bullets, it depends on where the droids decided to wander while you were waiting earlier. When you have an opening, go for it, mantle the box across from you, hop onto the elevator, and press the button.
Now, you're in another nice fix. There are several Protocol Droid crates up here, and a laser turret to boot. I was smart and forgot to hack security in Cargo Bay 1B, so here goes: At the top of the elevator, hop into a hole in the wall of boxes, and run across to the safety of more boxes. Next to you are 3 cyber modules, swipe them, then turn to face the security crate. Crouch, then inch forward until your gibbon arms can reach. Inside are 22 nanites, a med hypo, and 6 standard bullets. Now, turn around, hop onto the elevator you sent up earlier, and ride it down to relative safety.
Now comes the fun part. Go back to the body in front of the Protocol Droid crates. Don't search her yet, but I'll go ahead and tell you that she has 5 nanites and a Cargo Bay 2A/2B access card on her. When you frob(right-click on) her body, you'll have a few seconds before two of the Protocol Droids come out and greet you, so grab the goodies and get out of Cargo Bay 1 fast. If you're lucky, the Protocol Droids won't follow you out, if you aren't, well, just be ready to dodge them when they come. Also, be wary entering the four-way room, there might be one or two spawned friends there to play with. If there are, beat them down, then head into Cargo Bay 2.
Cargo Bay 2A
Once you're inside, run to the left and try to make it through the doorway farthest from the laser turret without getting hit. Look around in here, in a narrow hallway of boxes, there's a corpse with 6 rifled slugs on her. Now, we have a bit of a problem. The only working elevator here is in clear view of the laser turret. So, rush the turret from behind, and take it out. You can wait for it to retract first, if you want. On the corpse beside it, you'll find 8 nanites and a log. Now, take the elevator up to the second level.
There's a pipe hybrid up here, so end his life, and grab 6 standard bullets off of a box in the alcove he came from. Step back onto the elevator, but before heading up, look at a niche in the boxes on your right, when you're facing towards the turret. There's a container of 15 nanites there, if you want, you can try to jump over and get them, but be careful. It's tough jumping back onto the elevator from there, and it's a nice hike to get back here from the resurrection station. Not to mention the fact that you'll be swimming in nanites by the time you get to a point when you really need a lot of them. Whether you decide to go for it or not, head on up to the third level when you're done.
The shotgun hybrid up here likely got very upset when you killed his comrade, so be ready to take him out when you arrive. On the corpse up here you'll find two cyber modules and a bag of chips, and in the security crate, a psi hypo, 20 nanites, and a bottle of juice. Now, walk over to the broken elevator. There's a container of nanites on it, but the problem is, the second you step onto the elevator, it falls, taking you with it, and making a very nasty mess on the floor. However, if you're careful, you can step onto the elevator and run back off of it before it falls too far. Just be extremely careful. There's also a container of 15 nanites in a niche on the second level, but the only way I've found of getting to them safely is by using Kinetic Redirection. This is obviously out of the question, and since I haven't found another way, just forget about it, and go down the working elevator.
Once you have arrived, walk around and grab the 15 nanites off of the broken elevator, if you dropped it, then head into the other room. End the life of the pipe hybrid here, then grab a med hypo and a surgical unit key off of the corpse behind him. Head up the elevator, grab 6 standard bullets off of a box, then head up again and drastically shorten the life span of a shotgun hybrid. The corpse up here will let you borrow 5 nanites from him, without interest, even! Isn't that nice? Now, head down the elevator. See the big sliding doors? Go through them, and you'll find yourself in Cargo Bay 2B.
Cargo Bay 2B
Once you're through the door, you'll hear two very angry pipe hybrids, take them both out.
Now, whatever you do, do not press any of the buttons for the elevator that is already at the top floor.
This one is broken, and if you press any of the buttons, you'll get a message that says, This lift is malfunctioning. Maintenance will arrive shortly... Please wait.
Guess what?
It isn't kidding.
After a few seconds, a maintenance droid will show up, and fixing the lift isn't high on it's priority list.
Instead, head to the other elevator.
As you approach it, you may hear a turret open up.
Don't worry, it's on the other side of the boxes, we'll deal with it when necessary.
For now, take the elevator up to the third floor, bypassing the empty second floor.
In the security crate up here, you'll find a bag of chips, 6 armor-piercing bullets, and a med hypo. On the broken elevator there is a male corpse with 6 standard bullets on him, and 3 in his gun. Now, having cleared this section out, head back to the first floor.
Watch out when you're riding down, in case the turret decides to try to shoot at you, and also be alert for any baddies who might be waiting for you. Now, we need to take out the turret. Problem is, there's a maintenance robot in the opposite room. Now, you have a couple options on how to deal with this next part. I'll list them:
- If you're hacking, and want to try to get the turret to shoot the robot for you, be my guest, but you may want to take security down first.
- TheNightTerror has another way of dealing with this situation, and it's a good one, so I'll put her's here.
Next, there's a segment that can be problematic. There's a hallway with a turret in it, and there's a maintenance robot nearby. But, remember in the nice big room where there was the turret by all the explosive barrels? And how you could get the turret to shoot the hybrid for you even if it wasn't hacked? You can do the same thing here. The turret will probably fire a few shots at you as you run into the hallway and hide behind the boxes, and that will send the robot on a search. Jump up and down and bang on the boxes, and he should show up. Walk into him, and beat him with the wrench, the combination of being beaten by the wrench and the turret will probably see him die shortly. Just back up before he explodes and get out of the turret's sight before it has a clear shot at you.
Whichever way you do it, after you have taken care of both, search the desk between the rooms; there are 5 nanites, a pack of cigarrettes, and a log inside of it, and a mug sitting on top of it. In the next room, there's a woman with 6 anti-personell shotgun shells, and another broken elevator. Again, don't press the button unless you want to play with another maintenance droid. Take the working elevator to the second floor.
Up here, there's a female corpse with 2 cyber modules and 6 anti-personell bullets, take them, then listen to the robot above you. You'll have to take him out. Look around, and you'll notice a hole in the ceiling that you would normally stick a ranged weapon through to take care of the robot. *Funny, I never realized you could do that before. That's Enchantermon for you, always far more clever than me! -TNT*

Peek through here and check to see where the robot is.
But, since you're using the wrench, take the elevator up and smash him that way. After he's gone, get the log from the female corpse in this room, and mantle the boxes by the working elevator to get 10 nanites off of a corpse. Listen to the log to get the code you came for, then head back down to the first level, snatch a Delacroix log off the floor, and get out of Cargo Bay 2, dealing with any spawned friends along the way. Well done!
Now, let's skip the basic walkthrough and get the hell out of here!
How to cope with the Cargo Bays, simplified, by TheNightTerror / Top
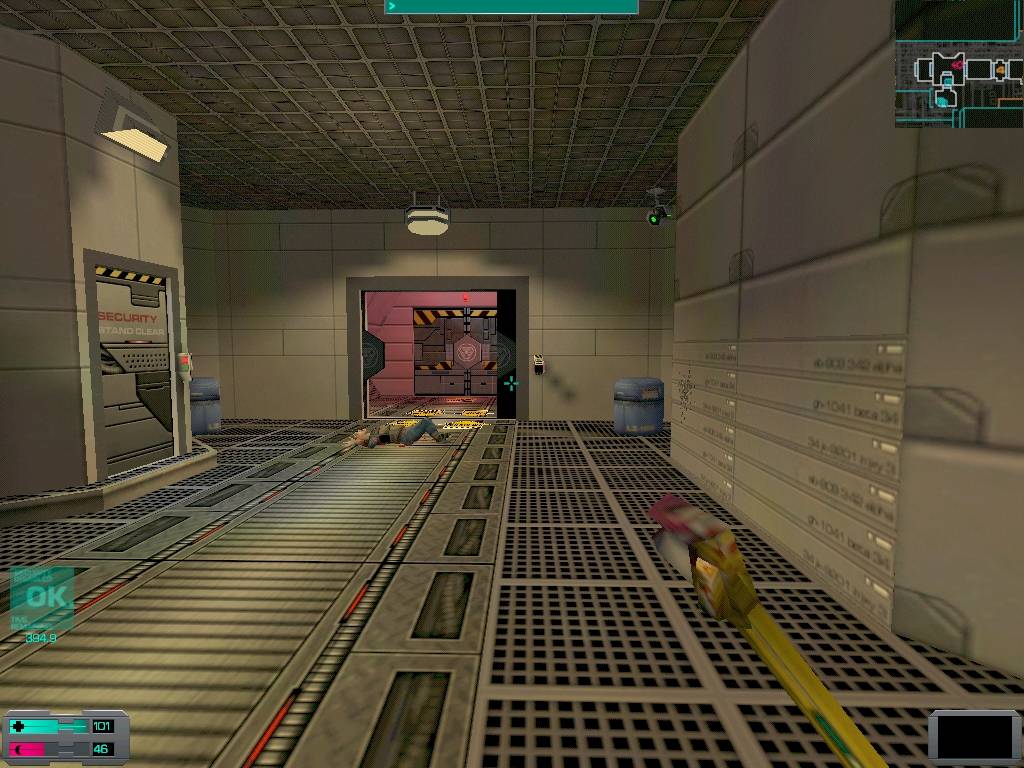
You can't immediately get into Cargo Bay 2, where the woman who recoded the door in Hybrid Spawn Central is hiding, so go to Cargo Bay 1. There was some kind of itty bitty problem there, there's a corpse under some debris, and the key card slot is smoking. The door will open anyways, which is always nice. Smash the debris to make your escape easier. And you'll see the hallway is littered with protocol droid shipping crates, which isn't so nice, even with a resurrection station going, considering sometimes they break out of the crates and come say hello. You could destroy the crates themselves but they explode, so you'd just be creating more of a problem.
You can probably hear a robot to your left and a hybrid to your right. You want to go towards the hybrid, who packs a shotgun, waiting until you can barely hear the robot before you go couldn't hurt. If you don't want to search the whole cargo bay, and you only want to get the card, you don't need to deal with the robot at all. Take out the hybrid, then go to the back of the room.
You'll see a long row of protocol droid crates with a body lying in front of them. There's an elevator between the row of crates and one of the doorways you can enter from. If you don't want to/cant do some protocol droid explosion dodging, then this is your salvation. When you go out of use mode when you search the body, who has the Cargo Bay 2 card, the droids will be released. Unless you're dodging the explosions, run to the elevator and take it up. Wait for a droid to walk under it, then drop it on its head. It's quite funny. "Sir, where are you?" *BANG*
Once you're safe, head out to Cargo Bay 2. I thought I was in the clear but a droid spawned in the room with the 4 doors and came and blew up in my face. Goggles managed to shake it off, but then I heard 'hazardous anomaly' from behind me. Robot on the way! I went through the door to get closer and ran face to face into a pipe hybrid who Im guessing also spawned at some point. The robot didn't find me, though. I just thought I'd share in case something similar happens. This is why I never clear out levels until I'm almost finished with them, I don't need the heart attacks I get when someone pops up from behind me and starts emptying their shotgun into me.
Back on topic here. Once you get to Cargo Bay 2, you need to get all the way to the other end of it, then go to the top level to find the log with the code to the door. Once in the bay, hang a right, and head over there. Before you go through the door to Cargo Bay 2B, you'll probably run into a pipe hybrid, past it there's 2 more. *Before you go through the door into Cargo Bay 2B, stand directly in front of it, then turn around and walk forward, you'll find a body with a med hypo and surgical unit key on him.*
Next, there's a segment that can be problematic. There's a hallway with a turret in it, and there's a maintenance robot nearby. But, remember in the nice big room where there was the turret by all the explosive barrels? And how you could get the turret to shoot the hybrid for you even if it wasn't hacked? You can do the same thing here. The turret will probably fire a few shots at you as you run into the hallway and hide behind the boxes, and that will send the robot on a search.

Hide over there and lure the robot to his doom.
Jump up and down and bang on the boxes, and he should show up. Walk into him, and beat him with the wrench, the combination of being beaten by the wrench and the turret will probably see him die shortly. Just back up before he explodes and get out of the turret's sight before it has a clear shot at you. *On the desk past the turret but before the rest of the cargo bay, there's a mug, and inside the desk is a pack of cigarettes, 5 nanites, and a log.*
This desk, in case you missed it.
Head into the next room, and ride the one working elevator up to the top floor. There's a robot up here, jump up and down until he comes over then beat the crap out of him until only debris is left. You could leap forward off the elevator, search the body of the woman who has the log then go back down, but what's the fun in leaving the robot alive? Don't bother getting the French-Epstein device she has, though. I never was able to recycle it, therefore it's of no use.
It's time to backtrack... / Top
Head back out of the Cargo Bay, and leave via the bulkhead you came from. Return to the grav shafts where you found the log from Sanger, and the unhackable keypad. If you went on a rampage and tore apart the room the bulkhead leads into, just walk there, if not, kill yourself and go there from the other direction. Once at the doorway, crack open the door, for the lazy people, the code's 15061.
There are 6 anti-personnel bullets on the corpse, and a log on the floor. Try to use the computer, but you'll find out it's not working either. However, the log on the floor is by the ever resourceful Delacroix. She installed a back door to the fluidics control computer. You need 45M-DEX from Auxiliary Storage 5. Bad news is its back to the radiated coolant tubes for you! Before you leave via the grav shafts, check under a displaced metal sheet, you'll find a med hypo.
Remember where you went to trigger the e-mail from Polito back at the beginning of the level? Keep going down that hallway and you'll get there.

In case you're totally confused, this is the corridor you're going for.
There's a few friendly beings along the way, a shotgun hybrid, and a pipe hybrid. When you get to the room, search the body and swipe his 2 cyber modules. Open up the door, 34760 for the lazy, and head on in.
Ah, a chemical store room! Beautiful. Find 45M-DEX, and bring along the chemical V. Why? Why not? Head in the room in back, kill the monkey, and search the desk and swipe 10 nanites and 6 bullets. Delacroix said to install the hardware override you just picked up in command control, which was where the resurrection station was on the other side of the bulkhead. Head back there. *If you go left from the chemical store room door, you'll find a body with a rad hypo, a Delacroix log, a rad hypo on a ledge, and, across from the door to the rest of the tubes, a Sanger log.*
You'll probably run into a spawned friend or two along the way, maybe even seven, one spawned right in front of my eyes when I went through the bulkhead. Once you get to command control, install the hardware override in the slot, and you'll be able to get the coolant tubes purged. Head back there, commiting suicide to get past the turrets again if need be, and clear out the radiation.
Time to get the ship online! / Top
The coolant tubes are now safe to walk in, so if you had your hazard suit equipped, put the combat armor back on. Take hallway that was the most radiated, and keep an eye out for corpses or hybrids you may have missed.
In case you forgot, this is the hallway you want to take.
*You'll find a male corpse with 5 nanites, a rad hypo on a ledge, and 5 nanites on yet another corpse.* Once you get back to the door that was locked before, head in there, then climb up the ladder, and go through the door. You should be in a nice big room. There's a pipe hybrid who will shortly come up the ramps across the room. There may or may not be a monkey around here. On occasion, I've found the monkey caught under the grating by the door to the starboard nacelle. If he's stuck there, walk over and laugh at him. He'll try to shoot you, but since the blast will hit the grate and be close enough to hurt him, he'll die after 2 shots. *If he's not there, head over to the grate and swipe a log hidden in the shadows near there.*
That aside, now you need to power up computers in each of the nacelles, which order is up to you. Keep in mind there's a shotgun hybrid in the port nacelle, and a camera in the starboard nacelle. To destroy it, run into the room behind it before it sounds the alarm, then take out the window. Crouch in the window sill, stand up, (you'll hit your head on the top of the window sill) then lean forward. Smash the camera, then crouch again so you can get out of the window frame.
Once the camera is down, *you can get some extra goodies in the starboard nacelle.
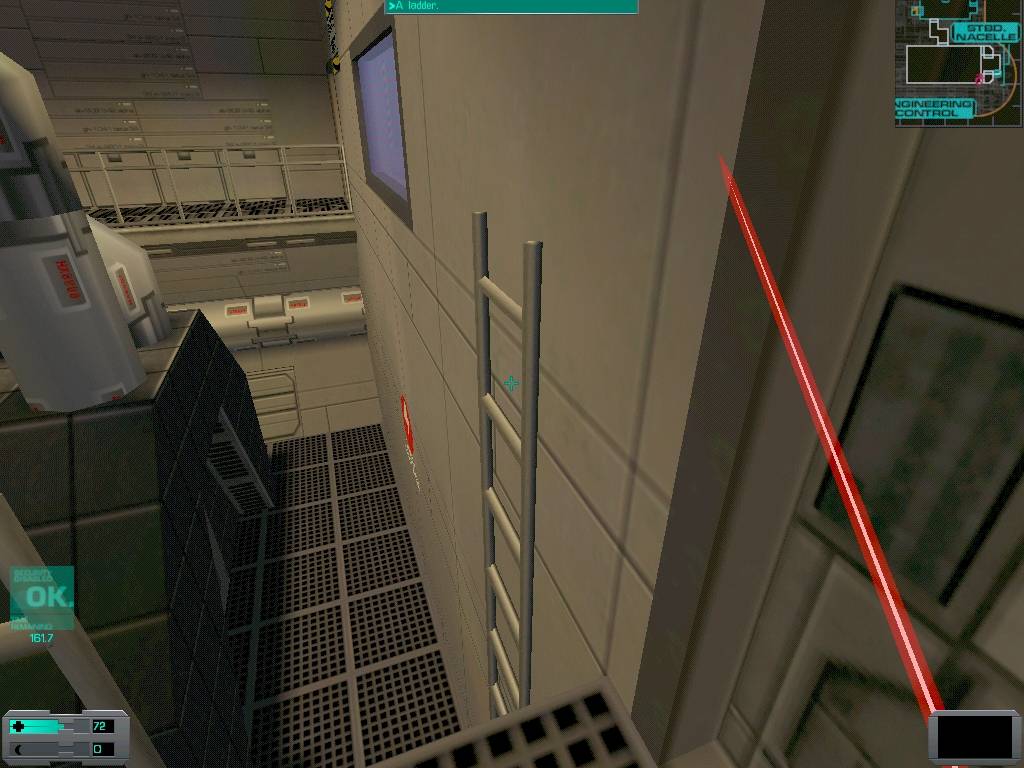
Take this ladder down to the lower level.
If you go down to the bottom level, you'll find a door leading into a colorful room guarded by a monkey. Take him out, and past him you'll find a med kit, 6 rifled slugs, a psi booster, and a shotgun with one rifled slug in it. * I wasn't aware of this until D'Arcy pointed it out in a thread completely unrelated to any of my insane melee only stunts, but if you leave the nacelle, go right, then walk around the nacelle, you'll stumble across a corpse with 2 cyber modules on him. When you've powered up both computers, head down the ramp to where the pipe hybrid appeared from. There's a corpse with 15 nanites and a laser rapier on him. If you want to use it, store it somewhere, and like I said before, you should wait until at least Ops deck before getting the skills for it.
Check your map, you should notice there's some numbers near where you are, meaning there's either a higher or lower level nearby. Go to number 1, it's an elevator which will take you to where you need to go. Once you're up there, activate the computer in the room. Odds are you'll upset the shotgun hybrid nearby and he'll come for you. If you go out to greet him in the room where he was, beware the camera above the door with the keypad. It's too high to reach, but you can dodge it once you're far enough into the game to get the code for the keypad. There's two doors leading out of the room with the main power computer, go into the one you haven't been through yet. There's 2 bottles of booze, a bottle of juice, a pack of cigarettes, a mug, and a log lying around, and inside the desk, there's a psi hypo and 10 nanites.
A Side Trip / Top
Do you feel like cracking some more skulls and getting a few more supplies? If so, read on, if not, skip to the next section and go to the elevator. There's a lift that was offline before but works now, the one by the hatch you used to get into the engine core. Go down it. Inside the security crate right next to the lift you'll find a bottle of juice, a PsiBoost Implant, and 6 anti-personnel bullets.
There's a shotgun hybrid just down the way, end his life. On the platform opposite the one the hybrid was on, there's a corpse with a speed hypo, a female corpse with 2 cyber modules and 12 nanites, *and by the male corpse, a pistol with one bullet left in it.* Past the archway there's a turret, neutralize it however you want. There's nothing on the platforms past the next archway, past the next one and you'll have 2 shotgun hybrids to play with.
Once they're dealt with, it's time for your first cyborg midwife kill. Hopefully you'll be able to research some of her guts once shes dead and you can kill the rest faster. When you can see her, charge her, then crouch and swing. The midwives have both ranged and melee attacks, but if you crouch, they can't hit you, unless you're below them on a slant, or too close. It's a dirty job, but someone's gotta do it. They're rather disturbing creatures who really need to die. The corpse near her has 12 standard bullets on him. Head up the lift, and back to the elevator. Once there, you can either read the section on preparing for Hydro, or you could just head straight there.
During my game where I noted what stats I upgraded when, I took my strength stats from level 4 to 5 after Engineering.